GTA Online: Kortz Center Heist Review
 The Kortz Center Heist is part of GTA Online’s 2026 update. This heist is similar to many other heists, but this article will discuss whether or not it’s worth the effort. Let’s explore.
Preface
The Kortz Center heist, like the Cayo Perico heist, supports 1 player in its job mission. It is now the only other heist that supports 1 player. However with 1 player, your maximum take is around GTA$2 million because of the loot bag size. There are other bugs that you may encounter during the heist that actually make completing the heist much more difficult than it should otherwise be.
The terrain around the Kortz Center also makes this mission into a captive area. When attempting to leave the area, you are forced to make your way down or up very steep hill terrain. There’s no way to make a clean getaway from this specific location in the game. There are also very few places to hide during the getaway.
This issue is compounded by the job mission saddling you with very limited types of weapons, very limited access to vehicles and that no Mechanic vehicles called during the mission will spawn on the Kortz Center hill. No, they won’t spawn in the parking lot area or on the road leading up to the Kortz Center. The closest spawn area for vehicles is on the road running in front of the Kortz Center entrance, a very very long way away if running. Don’t expect to call the Mechanic to deliver a vehicle to your position wherever you have exited.
Also, don’t expect to get down any of the hills quickly on foot. You will literally be running for minutes trying to run down the hills to get to a road.
It should also be noted that even though you can call the Mechanic for a vehicle and park it on the grounds prior to entering the Kortz center, that vehicle will be despawned upon exiting the Kortz center; it won’t be where you left it. You are forced to use the getaway vehicle you selected when you began the job, assuming you can even find where that vehicle is actually parked.
Prerequisites
As with all heists, you will need a number of prerequisites to even begin the heist. These prerequisites include the following:
- CEO (Agency property) OR Bike President (Clubhouse property) OR VIP (~GTA$1 million) (GTA$1-3 million)
- Own at least ONE Mansion property … PLUS (~GTA$3 million)
- Purchase the Art Studio expansion room for the mansion (~GTA$3 million)
- (Optional) Arcade Property with Drones
To get access to the heist mission planning board, you will need all of the above. These items above will cost you roughly GTA$9 million to GTA$10 million, not including the arcade property.
If you don’t have these, you can join in on someone else’s heist and still help them perform the heist. If you want to be the heist leader, you will need to own all of the above to launch it.
The Heist Setup
As with all heists, there are a number of heist setup missions required (and some which are optional) to begin the heist. I won’t get into the details of every single heist setup mission, but suffice it to say that if you’ve played any other heists, there are no surprises here.
These setups are mostly time wasting missions that really do nothing to help you complete the heist, nor do they provide you with any income. You perform them, waste time and then that “unlocks” some objective. Rockstar is primo at providing heist setups that do nothing to actually help the outcome of the heist itself. Such setups include unlocking heist getaway vehicles, unlocking various weapon loadouts and unlocking various entry and exit points for the Heist. This is not a complete list. Suffice it to say that there are no surprises. Most of the setup missions are relatively easy, but they often require you to traverse the entire map bottom to top to get to the area to complete the objective. You’ll need a fast helicopter, Opressor or Deluxo to move you around faster.
Note that while the heist setup missions allow you to use special vehicles and special weapons, the heist job doesn’t. Be warned.
The Kortz Center Heist Preplanning
The actual heist begins by pressing START on the mission board within the Art Studio on the lowest level of your Mansion. The START button will only become available once you have completed the above mentioned required setup objectives. There are around 5-10 of them. You don’t need to complete everything, but you might want to complete it all to unlock maximum choices during the heist.
This heist also requires that you start and abort it multiple times so you can actually learn things that you can only learn while actually playing through the heist. This includes things like guard placement, camera placement, camera and guard cones of vision, hiding places, sneaking places, how and where you can move without being seen and so much more. There is no way to learn this without starting and aborting this mission multiple times. It also includes learning which entry and exit points offer the best access to the vault.
Unfortunately, there is no way to abort this job without your character losing all of its lives via dying. If you abort the mission by leaving the game via “find new session”, Rockstar penalizes you as potentially a “bad sport” because this mission is started as a “job.” This is one of the bugs I have found with this mission. As a matter of course, there is NO WAY to run through a test mission in advance to learn all of the required details of the mission area. You simply have to deal with Rockstar’s stupidity.
To be able to complete this heist in the way that you prefer, you will need to need to run through the heist multiple times as “trial and error” to find the best ways to get into and out of the heist itself with maximum bank. Yes, that means getting to a specific point in the mission, then aborting it.
Sure, you can “wing” it and get away with whatever amount is left over, but using the actual heist to learn how to navigate through it is the only way to finish the heist with maximum bank.
Stealth Option?
The heist itself leads you to believe that there is a stealthy way to get through the heist, while also getting away clean and undetected. Don’t believe it! That option doesn’t exist. Upon exiting the building after getting through the vault undetected, Raf will say, “It looks like a silent alarm was tripped” followed by a cut scene cinematic of the entire Los Santos SWAT team pulling up in front of the Kortz Center.
Even if you manage to get through the entire heist undetected, get through the vault undetected, get through the laser grid undetected, get through EVERYTHING undetected, the SWAT is still called in and you are still required to “lose the cops”, while trapped on top of the Kortz Center Hill with no way to call any vehicles to you.
You may be saying, “But what about the getaway vehicles?” What about them? I have still yet to find where these vehicles get parked after exiting the building. Clearly, they are nowhere near the exit location chosen. The HUD visibility bug doesn’t help me locate where they are either.
Entry Points
There are 4 main entry and exit points that you can scope. These include the following:
- Rappelling through the Skylight on the roof
- Using the sewer manhole located in the Maze
- Using the employee entrance into the art gallery (upper or lower level)
- Using the basement entrance in an AlphaMail van and outfit
Rappelling
This is probably the most difficult entry point because it requires making your way to the roof, avoiding a number of guards and cameras getting up there. Then, once inside the gallery, you have to again avoid a number of guards and cameras to make your way down into the basement.
See the AlphaMail entry point below to learn more about the basement area. Ultimately, to rappel, you will need to visit and traverse through at least 3 heavily guarded areas before getting into the vault. Wearing any gear other than the AlphaMail or Hazmat suit will work for rappelling. Though you can probably rappel in those outfits. You must wear those two specific outfits for the AlphaMail disguise entry and the Sewer, respectively.
Sewer
The manhole sewer requires obtaining a manhole tool to open the manhole cover to enter into the sewer. It also requires wearing the Hazmat suit. You will need to perform the setup that obtains the Hazmat suit if you want to enter through the sewer.
Once inside, Raf will send you a text message describing the proper gates to enter to get into the basement area. You will need a weapon with a flashlight to be able to see the markings on the wall to enter the correct gates. This entry point lands you into the basement, but at a different entry point from the AlphaMail entry point.
Employee Entrance
The employee entry point requires a keycard to enter. You get this keycard during a heist setup mission. You will need to get past a number of guards and cameras to make your way to the employee entrance keypad. You don’t need to hack this keypad when you have a card. You will enter on either the first or second level of the gallery depending on which entry point you choose.
This entry point is very similar to the Rappelling entry point in that you’re in the gallery and you need to make your way down to the basement, which means avoiding a bunch of guards and cameras inside the gallery.
Note, for maximum haul inside the gallery, you will need at least two people. There is a gate that is down on the second level that must be opened using the CCTV camera room. It requires one player to handle opening the gate and another to get into the room to smash and grab. A minimum of two players is required for the upper gallery area.
AlphaMail Van and Outfit
This is the final entry point into the Kortz Center and probably the easiest of all entry points to use. There are limited guards and cameras that you need to handle along the way. This is the only of these four entry points that you can successfully sneak and stealth your way through.
With this one, you’ll wear an AlphaMail employee outfit and drive an AlphaMail van (you get this in the setup). This one gets you into the loading bay of the Kortz Center with no difficulties. You can even walk your way past the two initial loading dock guards with no combat. You will be required to get an employee card to unlock the door, but even doing that doesn’t alert the guards.
This entry point is, by far, the simplest and easiest. You only need to stun about 6 guards and shoot out one camera to get into the vault laser grid area. It’s super simple up to that point.
Getaway Vehicles
The getaway vehicles offered are 4 Manchez motorcyles (one for each team member), an Annihilator Helicopter or an armored Caracara 4×4. None are particularly better than any other in terms of getaway vehicles. I’ve never used the copter because I assumed it would be parked on the roof as a getaway vehicle.
From every exit point, it almost impossible to make your way back up to the roof to get into the copter. That getaway vehicle is nearly pointless, unless you want to lose nearly all of the contents of your loot bag. I have no idea where the Caracara gets parked nor the motorcyles. One thing is certain, they are parked nowhere near the underground exit when following the AlphaMail entry type.
Loot Bag
And here we come to the sour part of this heist. Each player has a loot duffel bag that they carry around as part of the heist. Each player can fill their loot bag with a limited amount of smash and grab gallery loot.
Unfortunately, Rockstar has intentionally made the loot bag size so small per player as to make the gallery area of the heist almost useless. One player loot bag can hold at most two cut paintings. Even though the gallery has probably 30-40 (or more) items that could be scoped and nabbed, the loot bag is so small that there’s no point in even going into the gallery when you’re the one handling the vault.
In fact, there are 4 paintings inside the vault besides the primary target painting (which doesn’t consume loot bag space), only two of those cut paintings will fit inside of the player’s loot duffel. Once you nab the three paintings from the vault, there is no reason to even enter the gallery to smash and grab. This not only negates the entire gallery area as a single player, it forces you to use multiple players to even consider entering the gallery area.
Heist Strategy
If you have 1 player only, the heist strategy should be to use the AlphaMail vehicle and outfit. This gets you straight into the basement and very close to the vault. Because the loot bag is so small, you should ignore the gallery area and focus solely on getting into vault and nabbing the primary target painting along with two of the other stored paintings. This will fill your loot bag.
If you have two players, the second player can loot portions of the gallery while one player loots the vault.
If you have four players, three of the players can focus on the gallery and nab whatever they can fill into their loot bags, with one player focusing solely on clearing out the vault. If attempting this with multiple players, don’t worry about stealth at all. Simply set the alarm off and get started nabbing and grabbing.
Entering the Laser Grid and Vault
There is nothing that you can pre-prep that will help you get past the laser grid. It’s simply a matter of timing to avoid the laser beams. It’s best if only ONE player attempts to get past the beams undetected. Multiple players will inevitably set off the beams.
Inside the laser beam area there are three switches covering three grid areas. Each switch turns off the laser grid behind the player. You will need to sneak your way through the beams to get to each switch.
It is definitely possible to get to the switches and turn them off without touching any of the beams. It simply requires precise timing. However, it’s also a very slow process and rando players joining into this heist may not be patient enough for this kind of stuff.
Also, two new player actions are available while in the beam grid area: 1) crouch flat and 2) jump-in-place. The jump-in-place feature is actually not needed here. The jump-in-place feature is as it sounds. You can ONLY jump in place, not while moving. If you time the area with the ground sweeping beam correctly, you can turn off the switch without needing to jump. The jump in place feature is also not very precise. Inevitably, it’s more difficult to attempt to jump the ground sweep beam than it is to avoid it by correct timing.
This laser grid area will require multiple plays through to get the timing down pat. This is why you may need to abort and reattempt this area multiple times to figure out the timing. It took me about 8-10 attempts to finally get through the entire laser grid undetected.
Once you get past all three laser grid areas and turn them off while undetected, Raf will commend you on getting past all three grids. However, it doesn’t really help with the vault area and it doesn’t buy you anything other than remaining undetected. There is still effectively a “thermal detection” timer to exit the vault before being detected. You’ll want to nab the primary target painting as fast as possible, then grab two other random paintings in that same area and exit the vault and laser grid area.
This is why it’s important to scope out all of the paintings in the entire Kortz Center area before attempting this heist. If you don’t pre-scope those paintings in the vault, you may not be able to grab them.
Once you are out of the laser grid doors, you can use the SecuroServ app to EMP blast the power and turn the lights off. This will help you escape the building easier. There are four exits from the basement including the way you came in, including the sewer, the gallery and the basement loading bay.
Bugs
Vehicle Disappears
There are many bugs present that help ruin the immersion of this mission. If you arrived via the AlphaMail van, that van will have disappeared in the loading bay area. You cannot use it to exit or leave the area. You must run your way up the loading dock road area and back to the exit. You will exit this garage on foot.
Guards Respawning After Vault
Even if you’ve taken out all of the guards in the basement before entering the vault, after exiting the vault and grid area, those guards will ALL have respawned. I recall that this even included fixing the cameras you have formerly taken out. This is a fairly big bug. If you’ve remained undetected this whole time, those guards shouldn’t respawn. If new guards have showed up while inside the vault, those new guards would have alerted that someone is breaking in because of all of the stunned guards. Yeah, big bugs.
Exiting from the Vault / Silent Alarm / No Stealth
Once you reach an exit, Raf says that a silent alarm was tripped and once outside you instantly have a 3 star wanted level. There is no exit that leads you off of the grounds. Meaning, no matter which exit you choose, you will face a 3 star wanted level with not only Kortz guards, but also SWAT and helicopters.
Don’t bother following Raf’s advice by using an Arcade drone to disable guards as that drone will instantly alert the guards that you’re there. Raf suggests using it, but it never works to remain stealthy. Use a stun gun instead. Basically, don’t take Raf’s advice at any point during the heist.
Touchy Alarms
The entire grounds of the Kortz Center is completely touchy for detection. You may find yourself doing nothing at all and still having the guards alert you for detection. It’s really annoying and touchy that this area can instantly alert everyone that you’re there. Like, for example, I drove my car up next to a wall where it can’t be seen like I had done several other times, and somehow it alerted the guards. I place the car up against this wall because I can stand on top of the car and then grab onto the wall. This allows me to get into an area to head up to rappel or use the employee entrance. It’s much faster to do this than having to walk nearly the entire grounds, avoiding many, many guards and cameras.
The touchy alarm nature of the Kortz area is incredibly frustrating. Once the alarm sounds, you’re forced to endure listening to that blaring alarm for the duration of the entire heist. This loud annoying alarm NEVER SHUTS OFF and NEVER quiets. You can’t even shut it off from settings. You have to mute audio on your entire rig. Yes, this is a bug and it needs an accessibility update.
Bad Sport
This part of GTA has been an ongoing bug for years. I’ve also reported this bug at least once. This “Bad Sport” aspect applies only to missions that start up as “jobs.” Not all missions operate as jobs, but many do. All heists operate as “jobs.”
Jobs are a special type of mission that allows for multiple players and for player matchmaking when in a public multiplayer lobby. Technically, you can only be a “bad sport” if you abort a multiplayer job, meaning that there are actually other players in the job with you. If you launched a job alone, you can’t be a “bad sport” because no other players are affected by your abrupt departure from the job. This “bad sport” issue is a bug that needs to be removed when players are playing jobs alone, especially when they’re playing it in an invite only server with one player. Single players should not be penalized after leaving “jobs” when no other players are participating.
Loot Bag Size
As mentioned above, the loot bag size is way too small for this heist. A real duffel bag would be capable of cramming in at least 10-20 rolled up paintings of the size allowed. This overly restrictive duffel bag size is blatantly obvious and I would consider this a bug.
Hard Game Freezes
This bug is unrelated to the heist itself, but instead affects general GTAO gameplay. Since the update that rolled out adding this heist and the Art Studio, the game now periodically hard freezes while moving around the map. The hard freeze happens at frequent intervals and lasts for between 5 and 10 seconds. While I can’t recall experiencing these hard freezes while inside of the heist, it happens often while near my Nightclub, Bail Office, Agency and various other random map locations. I’ve had something like a hard freeze about every couple of hours of play, but since this update, it’s increased in frequency to about every 5-10 minutes.
Radar HUD Unavailable
This bug is absolutely frustrating. When performing heists, I change my settings to use the bigger local map display on the HUD. It allows for better visibility of the guards and their cones of vision. The tiny HUD is just too small for this.
For regular playing, that tiny HUD is fine. For heists, it’s not. The problem is that sometimes the larger HUD remains stuck on the world map, not showing the local map. This means that you are forced to switch settings back to the tiny HUD map and then use the actual full screen map to see where the guards and cones of vision are. This is not optimal for game play. Both the tiny and the large overlay HUD map should display the SAME version of the local map.
Another related bug is that the local area map of the Kortz grounds doesn’t allow for moving very far from the player’s position. This is why I can’t see where the getaway vehicles are. The restricted limits of scrolling this local map means I can’t move it far enough to see where everything is. Even more than this, the local map has stupid view limits. Even if you can move it far enough away from the player, it stops displaying objects too far away from the player’s position. Moving to the world map is just as pointless and doesn’t show anything useful.
Effectively, there is no map that really works properly for this heist.
Gun Loadouts
For this heist, you get the choice of one of three different gun loadouts. Only one of the gun loadouts has a stun gun (Military). All three gun loadouts are very similar (Street, Military and Security), each with a different type of automatic weapon, a shot gun and a pistol. In the Military loadout, the pistol is replaced with a stun gun.
If you’re intent on trying a stealth approach, the stun gun is the only way this works. That means raiding Fort Zancudo to get this weapon loadout as part of heist prep. This weapon loadout is probably the most difficult to get of the weapon gathering heist preps.
The reason it’s great for stealth is that the stun gun drops a guard in ONE SHOT. Because the guards are wearing armor and helmets, it takes multiple shots to take them down with all other weapons provided. The stun gun is the ONLY weapon capable of one shotting the guards and preventing them from sounding the alarm. Keep in mind that some guards groan and gurgle loudly which can sometimes alert nearby guards, which will instantly set off the alarm. The stun gun works to subdue most of the time, but it is not perfect.
As mentioned in the bugs area, Raf does suggest, assuming that you own an arcade with drones, taking out guards with those drones. Trying to use a drone almost instantly alerts the guards that you’re there. Don’t do it. You don’t need to do this anyway.
Best and Worst Strategies
The best strategy to get into the Kortz center is using the AlphaMail van and outfit. This entry point gets you into the basement and into the vault area the easiest and fastest. This strategy requires avoiding only ONE set of guards to get inside. Two of those guards aren’t even combative in the loading area.
The worst strategies include rappelling and the sewer. Rappelling requires avoiding three different sets of guards to get into the vault. The first set is outside on the grounds. The second set is inside the gallery area. The third set is inside the basement area.
The sewer requires running around the grounds to find a sewer key. You can’t pre-prep this one stupid tool and bring it with you. Noooo. You have to find it on the grounds at the time of the heist in one of about 5 different spawn places. That means running around the grounds to each of these different spawn places to find it, increasing the chances of being detected. Once in the sewer, you exit into a different area of the basement that doesn’t make it any easier than using the AlphaMail van. Just stick with the van.
Commentary
Everything above describes mostly what’s needed to complete the heist. This area will discuss the problems and issues with this heist.
No Trial and Error
The first and foremost problem is the required “trial and error.” To be able to complete this mission correctly, it requires scoping out the entire heist actively while it’s live. This live “dry run” gives you information that you can get in no other way, like how many guards there are, where their cones of vision are, their walking patterns, how the cameras sweep and so on.
There’s literally no other way to gather this kind of information other than doing this during a live heist. Unfortunately, Rockstar gives no way to abort the mission other than by losing the character’s life. Rockstar also gives no way to “dry run” the heist and see the grounds as it is with a heist in progress. You’re simply left with two options, 1) do the heist without knowing anything or 2) to keep trying to do it for real over and over until you succeed. I always consider “trial and error” gaming a bug.
When will Rockstar finally allow us to launch a heist as a “dry run?” Meaning, a “dry run” that doesn’t allow for nabbing or grabbing or even completing it, but allows “trying out” various strategies against the guards to see what is successful and unsuccessful, try out various entry and exit strategies and try out other methods like stealth.
No Way to Abort the Mission
Note that calling Raf to request aborting the Heist doesn’t actually abort the live mission in progress. Instead, it resets the entire Heist as though you hadn’t started it at all. You will need to pay GTA$100,000 to re-initiate setup of the heist. Calling Raf is not what you want. This likely also means doing all of the setup and gathering missions all over again. Simply accept the “Bad Sport” consequences of hard “dry run” aborting and move on.
Too Complicated
This heading has many different aspects involved. From the poor choice in guns in each of the 3 loadouts to the lack of using special vehicles during the job mission. Rockstar always feels the need to overly hamstring the player by forcing them to use very limited weapons and limited vehicles, but also using up the player’s actual inventory of supplies, like ammo, armor and snacks.
This means that after the heist is over, whether aborted or completed, you’re going to need to buy more supplies, wherever you get them.
If we’re being forced into a job with limited and forced features, then the pool of supplies should be provided BY the job, not from the player’s inventory. When we exit out of the heist in whatever way, our actual supplies should remain untouched.
This heist also wouldn’t be this complicated if we could simply use our existing weapons, our existing vehicles and our existing perks, like calling Lester to call the cops off. That the heist forces us into these silly hamstrung situations and then restricts our ability to use basic features we already have, it’s stupid.
Is It Worth The Time?
This question is worthy of a debate, but in this author’s opinion, it’s a conditional no. Conditional, because it may be worth it IF you have enough players and IF you have the correct players who can help you through the heist properly.
Matchmaking Problems
Often, matchmaking throws in randos who not only sabotage the heist efforts, they actively play stupid games during the heist to try and cause it to fail. Because GTAO’s matchmaking feature is so poor, it’s really only worth playing this heist with people you know and whom you have specifically invited.
Poor Payout
As with all heists, the payout for The Kortz Heist is too low for the amount of money you’re required to spend up front to get started as well as all of the wasted time doing heist prep.
In this case, because you have to buy so many expensive properties just to be able to run this heist, getting maybe GTA$1.5 million out of the heist is simply not worth the GTA$9-10 million you had to put in. You’d have to run this heist at least 8-9 times to exceed what you had to pay to get access to the heist board.
The Art Studio heist board touts up to a GTA$4 million payout, when in fact the best that you get is around GTA$1.5-2 million per player. You can make this amount of money in an hour or two just doing non-job activities. You don’t need to waste time and frustration on this heist.
Lack of Stealth
Because GTAO intentionally negates the way stealth could be used to complete the Kortz heist, it’s not even worth trying a stealth methodology. With Cayo and the Diamond Casino heists, stealth is not really usable. With a museum heist, stealth is nearly a prerequisite. That is, performing the heist completely undetected. It’s worse, though. The game titilates you into thinking stealth is an option, but it really isn’t.
The game actively prevents this outcome when exiting. You are forced into a three (3) star wanted mode, but not just any three (3) star wanted mode. It’s a “special” five (5) star type of three (3) star wanted mode, with helicopters and SWAT and massive amounts of them… while trapped on the Kortz Center hill with very limited ways to leave.
Not only is the Kortz Museum grounds over-covered with too many cameras and far too many guards, the SWAT response at the end is a severe over-reaction. That painting stolen is not worthy of that level of police action. Rockstar overdid the response.
I realize why. Gamers expect a “hard” level experience, and that kind of police action at the end ensures that it’s difficult for the player to get away. Unfortunately, that over-reactive ending penalizes those of us who choose to want a stealthy option. Stealthy players should be able to end out this heist without a massive police action.
If you try to leave on foot heading downhill away from the Kortz center with the stars still flashing, the helicopters instantly find and target you. What’s worse is that because you’re saddled with a handful of piss poor weapons designed to help you against a handful of museum guards, these weapons do ABSOLUTELY NOTHING against helicopters shooting at you and SWAT teams in armored trucks. Rockstar, where was the pre-heist planning for this absolutely expected level of police action at the end?
You don’t have a homing missile launcher or any necessary long range accurate weapons needed to take down a helicopter. I’m uncertain if the Caracara 4×4 is still weaponized because I’ve not been able to even get to it after exiting the building. The Caracara 4×4 was weaponized when I picked it up from the Arena, but did Rockstar modify the vehicle at the Kortz Center? Even if it is, it’s not really enough to take down the multitude of helicopters flying around the Kortz Center. The Manchez bikes certainly aren’t. The Annihilator copter is really only good at sneaking away, but good luck at getting to wherever that getaway copter has landed.
Overall
This heist’s design is stupid and insipid. It’s exactly what you would expect from Rockstar, but the actual heist itself is stupidly designed. The loot bags are too small to be able to get away with much other than the main painting. Why even bother to head into the gallery itself when you can only fit two paintings in the bag beside the main target painting? Without a usable stealth outcome, the heist is again, stupid.
When all of this is combined with all of the bugs, it’s just not worth playing.
I’m also tired of Rockstar teasing players with a stealth option only to not provide or even allow a stealth closure to the heist. Stealth is actually the most difficult methodology to use because of the touchy nature of the entire area. It’s incredibly difficult to stay in stealth mode through the entire heist, but it’s incredibly easy to set off the alarm.
It’s like Rockstar laughs at all of the people who try to use stealth to make their way through these heists. It’s like Rockstar devs are saying, “Sucker!”
Yeah, no. Don’t bother with this heist… unless you really enjoy wasting your time.
Rating: 1.2 out of 5 stars (it could be much better)
As always, if you enjoy reading game reviews like this one, please leave a comment, like and subscribe.
↩︎
Fediverse Reactions


Randocity offers up various articles on various topics including tech, recipes, commentary and more.
GTA Online: Salvage Yard Review

You might be asking, “Is the Salvage Yard worth the money?” in GTA Online. The Salvage Yard is a new property you can own in GTA Online. Some gamers may be asking if this property is worth the money. Let’s explore.
Is the Salvage Yard Worth the Money?
Yusuf is a recurring character in the GTA series. He actually introduces you to one of his kin, Jamal. Jamal is the person who you will interact with if you decide to buy the Salvage Yard. Who actually runs this property is inconsequential, to be honest. It could have been anyone and the outcome of this would be the same.
In answer to the question, let’s explore the kinds of missions you can expect to play from the Salvage Yard.
The primary mission type, which incidentally requires you to become a CEO or VIP (which also costs money to set up separately), requires you access a computer in the Salvage Area. Keep in mind that this is a chop shop. There is no fixing or repairing here. The only thing that happens to cars you bring here is that they get chopped up and/or sold.
When using the computer, you get a choice of 3 car recovery missions. With each of these missions, the ultimate goal is to bring the cars back to the Salvage Yard. Getting that to happen is where these missions are a literal pain in the ass… and I don’t mean just the combat. If it were just combat, I could deal with it.
Mission Board Activities
The computer is how to access the main mission board. These are, like the Auto Shop, structured missions. However, the problem I have with these missions is that they are overkill. You’d think you were preparing for a heist. Instead, you’re literally just jacking a car and driving it back.
For example, one of the missions required 3 separate primary setup objectives, 5 optional objectives and possibly one or two others. The 3 primary objectives of one was 1) scope out the site, 2) recover some vehicle that might or might not be useful during the heist and 3) gather and hide weapons. The 3 primaries on another were 1) scope out the site, 2) destroy gas masks and 3) obtain a large truck.
Optional objectives include obtaining masks, obtaining clothing to wear or obtaining key cards for access.
These mission board activities are, bluntly, useless and pointless. For example, you had to go obtain an 18 wheeler truck, drag it all over Los Santos and then hand it over to Jamal… all for what? To drive it a total of 5 feet, get out of and then enter the Arena? Another objective was to recover a police helicopter. Oh, but instead of being able to grab the police helicopter I’m standing next to on the roof right where I am… nooooo, I have to drive halfway across Los Santos to pick up the exact same model of helicopter, but in a very specific location. *eye roll* All for what? To simply use the helicopter for only a handful of minutes solely to arrive at the site. These fetch quests are highly useless, annoying and exceedingly time consuming.
Intro Missions
The Salvage Yard tricks you into thinking the missions will be free to launch. Nope! Once you’ve completed the intro missions, you’ll find that it costs GTA$20,000 to set up each new mission. Who really knows if Rockstar won’t cause this setup cost to become some random amount between $20k and $100k depending on the rarity of the car in the future. This cost in addition to all of the convoluted prep? It’s stupid.
Tow Truck Missions
Separately from the computer mission board, if you have opted to buy a tow truck (rusty or new), having this vehicle unlocks a second way to make money with the Salvage Yard property. This activity is also what drives how much income shows up in your Salvage Yard safe. Doing more tow truck missions increases the daily take.
You can make two tow truck missions about every 30-48 minutes (I haven’t timed it). Once the two salvage bays are occupied, you must wait until the chop shop finishes chopping up the two cars into parts. You have no control over the speed at which this happens.
The average payout of a single car being chopped up is around GTA$30k plus or minus a little. If you wish to partake in this activity, you must visit the Salvage Yard, hop into the tow truck and start the tow mission. You will exit and then be given a car type and location. You must drive over there, latch onto the car with the tow truck and drag it back to the Salvage Yard. Once you do this, the chop shop activity begins on that car until it finally pays out many IRL minutes later.
Questions and Answers
Can I Keep the Cars I Recover?
No. The long answer is, kinda… but, you can’t do anything with the cars. Once you recover a mission board car, it gets parked in a space in the Salvage Yard. The only interaction you are given with that car is to sell it or scrap it out. You can’t call the Mechanic to drive the car as the Salvage Yard isn’t considered a Garage. There’s no way to use the “prized” cars you’ve spent a lot of time and money retrieving. So, what’s the point here?
Does the Salvage Yard have Garage Space?
No. Even though the Salvage Yard is about obtaining cars, that’s where its usefulness as a garage ends. It has no car storage spaces at all. You can bring one personal car into the Salvage Yard just for kicks, but the car will soon be ejected back outside. Unlike a garage that marks that your car is now living in that location, the Salvage Yard space doesn’t do this.
The Salvage Yard is not an official garage at all and does not show up under the Mechanic properties. Thus, any cars you retrieve for Yusuf and/or Jamal at the Salvage Yard are only good for selling.
If you were hoping for more garage storage spaces, this is not the property to buy. There is zero garage space at the Salvage Yard for personal use.
Are the Salvage Yard Missions Easy?
No. Like Heists and their associated heist excessive prep, this is exactly how the car theft missions are structured. These missions have not only major overkill setup, but most of the required mission objectives don’t serve any purpose in the final carjacking. For example, you might be required to steal an 18 wheeler truck, but the truck won’t be used in the carjacking. Meaning, you’d think you’d load the car onto the truck to drive it back, but no. Instead, you leave that 18 wheeler behind and never see it again. Instead, you’re tasked with driving the actual car back to the Salvage Yard.
More than this, there are many, many stupid and overkill additions to these missions. For example, I was tasked with obtaining an Arena car. When I got into the Arena, not only did I have to kill a major number of combatants, I then had to locate the car with a telescope, sit down and use a drone to disable the car with an EMP, then head down to the arena floor to a whole new set of combatants. Then, go over to the car, jack it and then drive it out of ONLY ONE single very specific exit that was marked.
After that, we come to find that the car is rigged with a bomb setting up a 2 minute timer. Not only is there a huge crew trying to knock you off the road, you have to make it to a quick stop garage to diffuse the bomb (signified by a completely black screen and a bunch of tool sounds dropping on the floor), which then exit back to a driving segment with the combatants back again… only to drop it off at the Salvage Yard.
Convoluted. It’s a friggin’ car.
Rockstar has lost their minds. If GTA had started off with these complex jacking mechanics, that’s one thing. Trying to introduce them now is insane!
Are the Tow Truck missions easy?
Depends. Some might require a light bit of combat, but most don’t. The difficulty is simply dragging the car back to the shop. The tow truck cable is unwieldy and stupid. If the car begins wagging too badly, it will detach and you’ll have to go hook it up again.
It’s not like some of us haven’t already bought the Slamvan flatbed truck which would be ideal for tow truck missions. Nope. They have to give us a crappy chain lift tow truck type for the shop.
Overall
Considering the cost to buy into a Salvage Yard (~GTA$2 million) + about GTA$2 million for the tow truck and other rather useless additions, that totals around GTA$4 million for this property. All for what? To recover a “mission based” car worth about GTA$300k or recover junker chop shop cars that will part out for about GTA$30k.
This is definitely not a property I’d recommend first if you’re wanting quick cash. If you’ve already invested in most other properties like the Nightclub, Arcade, Executive Office, Auto Shop (which is incidentally broken in this update), Facility, Bunker, Casino and various Motorcycle Club businesses, then the Salvage Yard might be worth it. If you’re just starting out in GTA Online, this is not the business to start with first.
Rating: 1.5 out of 5 (Rockstar overthinks everything)
↩︎
10 Best Ways to Make Money in GTA Online

Unlike Grand Theft Auto V, where lots of money is thrown the player’s way all the way to the end of the game, Grand Theft Auto Online isn’t at all like this. Let’s explore the top ways to make money in GTA Online. Before we get started, let’s clarify several issues.
Daily versus In-Game Day
There is some confusion with GTAO using the word, “daily”. The game world has a day that lasts around an hour of real world play time. Then, there’s an actual in-real-life (IRL) day.
The use of the word ‘Daily’ below in the Type area means 24 real world hours must pass before that challenge or event resets in the game world. The challenges do not reset based on the in-game day, but instead reset based on waiting a full 24 clock-on-the-wall hours from the last time you played it.
You can specifically see this timer when you visit the Lucky Wheel at the Casino. However, other events which also require a 24 hour waiting period do not have visible timers. Instead, you must remember the last time you completed that specific event to know when you can play it again.
Costly Purchases
Unfortunately, too many activities in Grand Theft Auto Online require spending significant amounts of GTA$ to unlock access to those missions and areas (i.e., Cayo Perico Island). Once unlocked, you can then run those missions and make whatever money is given. However, the game is severely lopsided with too many of these missions and areas, such as Heists, falling into this category. What this all means? It means that Rockstar requires that you spend millions in GTA$ to gain back only a fraction of that money after completing the missions. This article intends to focus on the easiest ways to make money including ways that are entirely free (no costs involved), which don’t cost too much and/or ways that return a significant or passive amount of GTA$ for any money spent.
Any mission or activity which requires you to become a VIP, CEO or Motorcycle Club President (MCP) means you’ll need to purchase at least one of a VIP organization, an Executive Office (CEO) or a Motorcycle Clubhouse (MCP). All of these require at least GTA$1,000,000, with the VIP option being the worst deal in the game as you get no property out of the deal. If you’re going to pay at least GTA$1 million, you might as well get property out of the deal.
For activities in GTAO which primarily seek to take your GTA$, these are mentioned at the bottom of this article. Though, these activities aren’t worth playing simply to make money and should be avoided for that purpose. These up-front cost missions should only be played for their entertainment value… and only if you have the spare millions of GTA$ needed to unlock them. However, you don’t need to pay to unlock these expensive missions. There are plenty of activities which will yield GTA$ without paying anything.
Update for June 2022
Rockstar has permanently upped the ante for the Nightclub daily payout. Instead of the pittance of GTA$10,000 per in-game day, the game is now paying a whopping GTA$50,000 per day with a maximum safe capacity now at GTA$210,000. Normally, we would only see this kind of bonus as a short term weekly promotion. It seems that Rockstar has upped this payout permanently (or at least as permanently as Rockstar’s payouts can be… which probably means that it was a mistake and once Rockstar notices it, it will go back to GTA$10,000 per day). For now, gain from this while it lasts. So far, it’s lasted quite a while.
Is this update worth buying a Nightclub? Yes. In fact, I definitely recommend this purchase as the first property after purchasing an MC, VIP or CEO property. At GTA$50,000 per in-game day, you could see your Nightclub purchase refunded in around 30 in-game days assuming the Nightclub costs around GTA$1.5 million. In real world time and at 48 minutes IRL per in-game day, that would mean ~24 real life hours to see a GTA$1.5 million payout. If you play 4 hours a day, that’s around 6 days to recoup the cost of the Nightclub. After that, all money is bonus.
Tuners Update — Reduced Payouts
After the Tuners update rolled on July 20th, 2021, many payouts (including the nightclub missions) seem to have been reduced. This article is intended as reference, but know that with every update that Rockstar rolls, Rockstar can reduce payouts on any of what’s documented below without warning, as is the case with Simeon’s request and Nightclub missions. Simeon’s car request formerly offered up GTA$20,000 per car prior to Tuners, but has since been reduced on some cars to GTA$15,000 after this update. Rockstar just can’t seem to get enough of continually screwing us over.
Legend
The legend includes a Difficulty Level that ranges from 1 (Easy) to 5 (Medium) to 10 (Hard). The rest that appear in the legend are self-explanatory.
With these problems clarified, let’s start making some entirely free GTA$ starting with the best first …
⤵
1. Spin the Lucky Wheel

The first way to earn money in GTA online is by spinning the Lucky Wheel every day in the Diamond Casino. This activity costs nothing.
Landing on the GTA$50,000 spot each day for 7 days will net you a cool GTA$350,000 a week. Performing this activity for a full 31 days will net you GTA$1,550,000. How do you land this spot every day? The simplest way is to close the application before the wheel stops spinning. Once you know the wheel is not landing on GTA$50,000 (easy to see), close out, then reload into the game and try spinning again. There are also other money spots on the wheel such as 25,000 casino chips (which can be converted to GTA$), GTA$30,000, GTA$40,000 and others. While the highest is GTA$50,000, landing on any of these money spots is free money. Take advantage.
The best thing about this activity is that you don’t have to spend any money or perform any silly activities to get this free money, but you do have to sometimes restart the app several times before you can land on the exact spot, which takes a bit of time.
Cost: Free
Type: Free Money, Daily, Recurring
Reward: up to GTA$50,000 max depending on which space you land
Difficulty Level: 1 (Easy)
⤵
2. Simeon
This free activity appears once per day. Simeon will send you a text to locate one of several cars from his list. It can take about 30-45 minutes real play time before Simeon’s text pops up. If you’ve waited that long without a text, this likely means it hasn’t been a full 24 hours since the last time you performed this activity. These cars range in cost and only one of those listed cars will reward a maximum of ~GTA$20,000 (some cars reduced to $15k after Tuners update July 20th, 2021). Locate the highest cost car in the list, lose the 2 wanted stars, take it to Los Santos Customs and paint it for free. Then, drop it off at Simeon’s dock warehouse garage to pick up your free ~GTA$20,000 (or whatever you find your car is worth). This one only appears every 24 hours, like spinning the wheel.
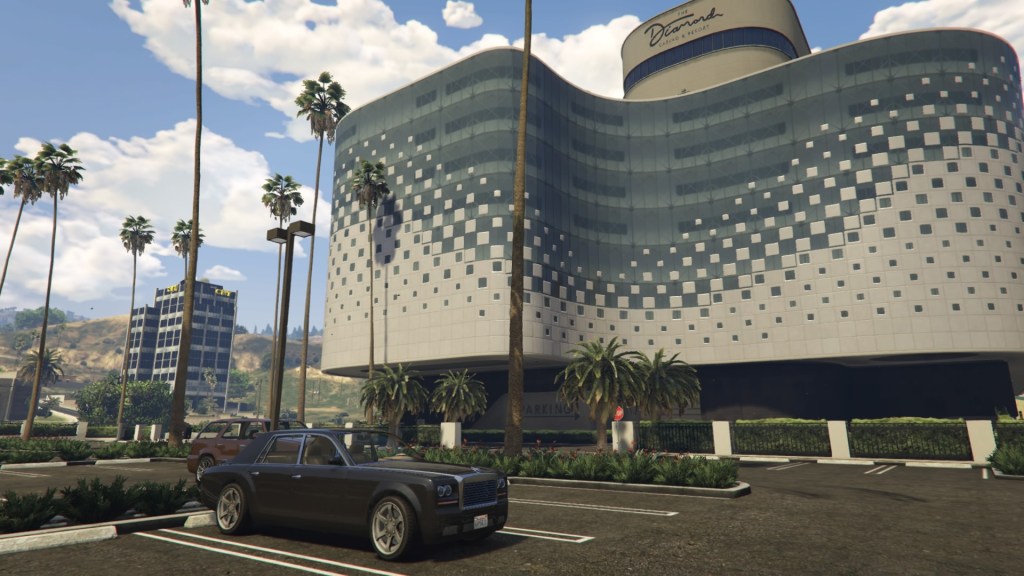
If you do Simeon’s text mission every day, in 31 days you’ll have made GTA$620,000. The challenge with this mission is in finding the car Simeon wants. The biggest hint I can give is try looking at the Diamond Casino parking lot. At least 2 times out of 5, you’ll find his highest priced car parked there, just waiting to steal.
Note, this one can be tricky. The game’s car spawning mechanic doesn’t sync up with this quest and won’t always spawn the cars Simeon wants. This means you can literally spend hours waiting on specific cars to spawn. Sometimes, the cars are readily available at a parking lot, sometimes you can drive around for hours looking. If after driving around for about 5-10 minutes without success, I recommend logging out and logging into a new server and waiting for Simeon to text you his newest list again. Moving to a new server can sometimes make this quest easier and faster. It’s worth noting that whatever it costs to repair the car at Los Santos Customs, after being chased by the cops, will be reimbursed to you upon turning the vehicle in. You don’t need to treat the car with kid gloves when heading over to Los Santos Customs. Once you’ve repaired and painted the car, then yes, you’ll want to be careful when driving over to Simeon’s warehouse at the docks.


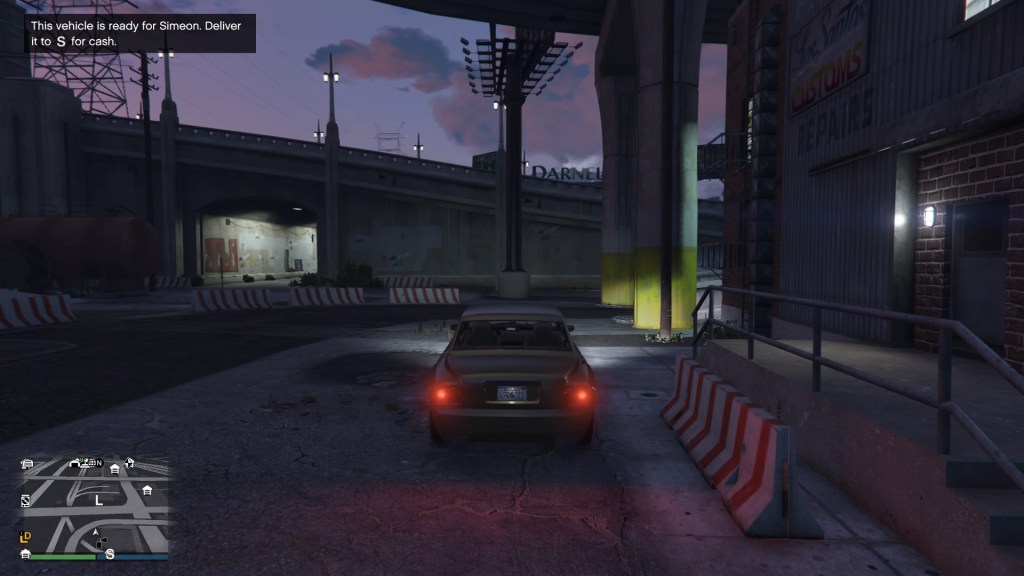


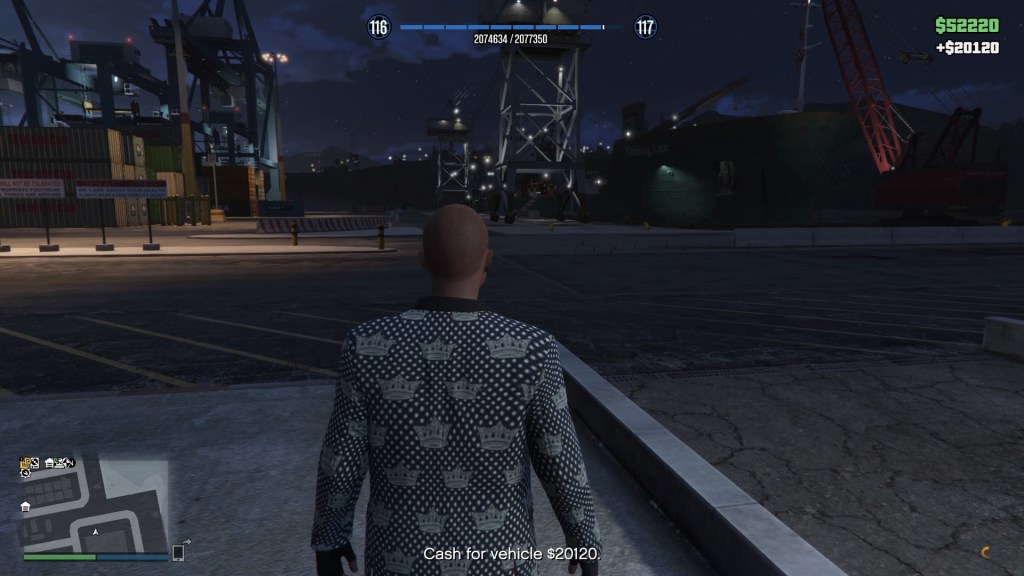
Cost: Free
Type: Active Income, Daily, Recurring
Reward: Max GTA$20,000 + repair costs reimbursed per day, depends on which car you drop off.
Difficulty Level: 3 (Medium… depends on whether cars spawn + must get rid of a 2 star wanted status + must drive car safely to the docks without damage)
Correction: I have since found that even though some cars have had their take reduced to GTA$15,000, some have not. The maximum is still GTA$20,000 + repair costs if you choose the correct car.
⤵
3. Stealing Cars
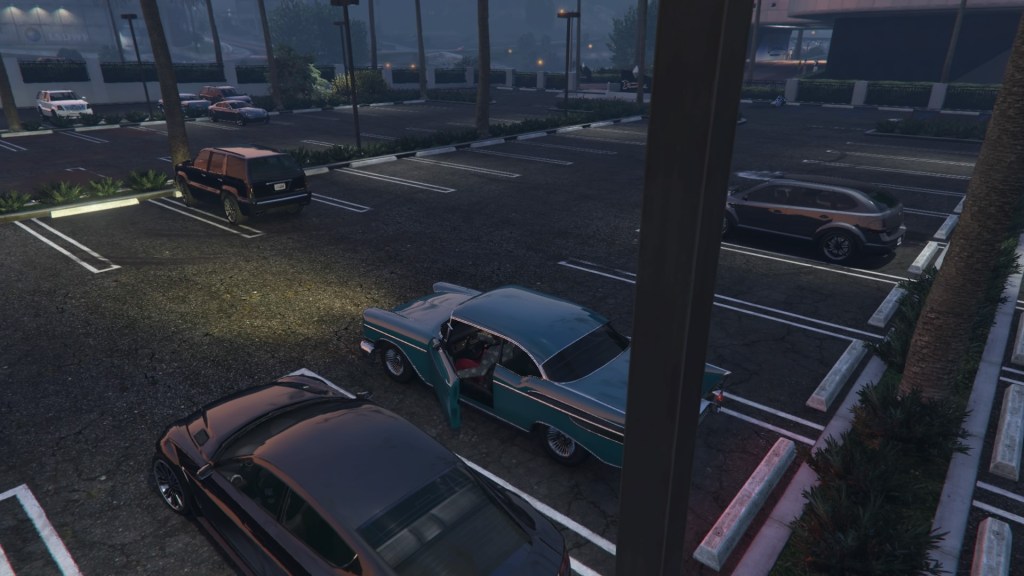
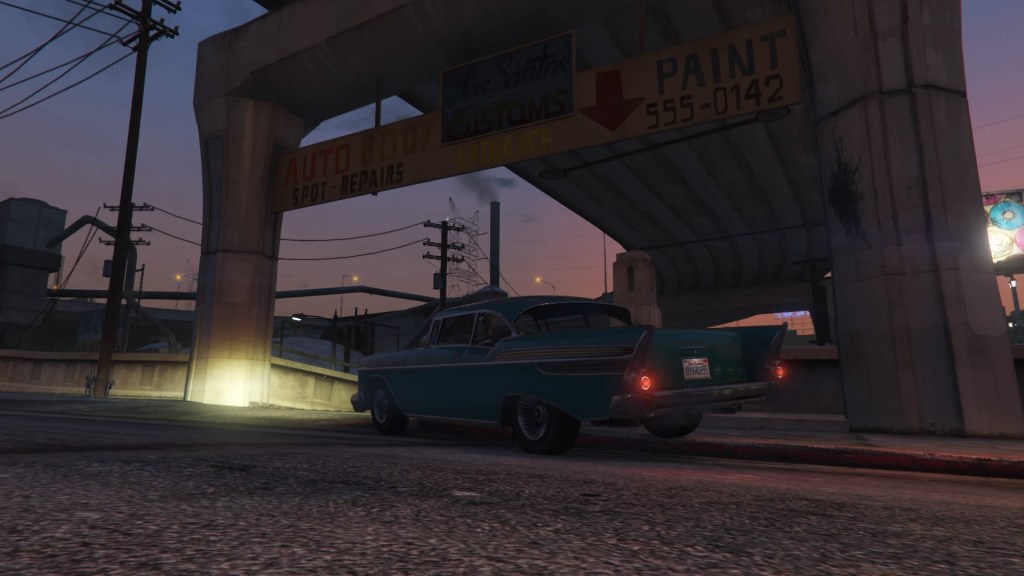
This is a free activity that can be had once per day. As in the game’s name as Grand Theft Auto, stealing random cars off of the street and driving them to Los Santos Customs can net you between GTA$3,000 to GTA$9,000 per car, depending on the car model you sell. You can only sell one car per day. While this isn’t a whole lot of money each time, it’s still enough that it’s worth doing for some quick cash.



Cost: Free
Type: Active Income, Daily, Recurring
Reward: Up to GTA$9,000 per day depending on which car you drop off
Difficulty Level: 1 (Easy)
⤵
4. Robbing Convenience Marts
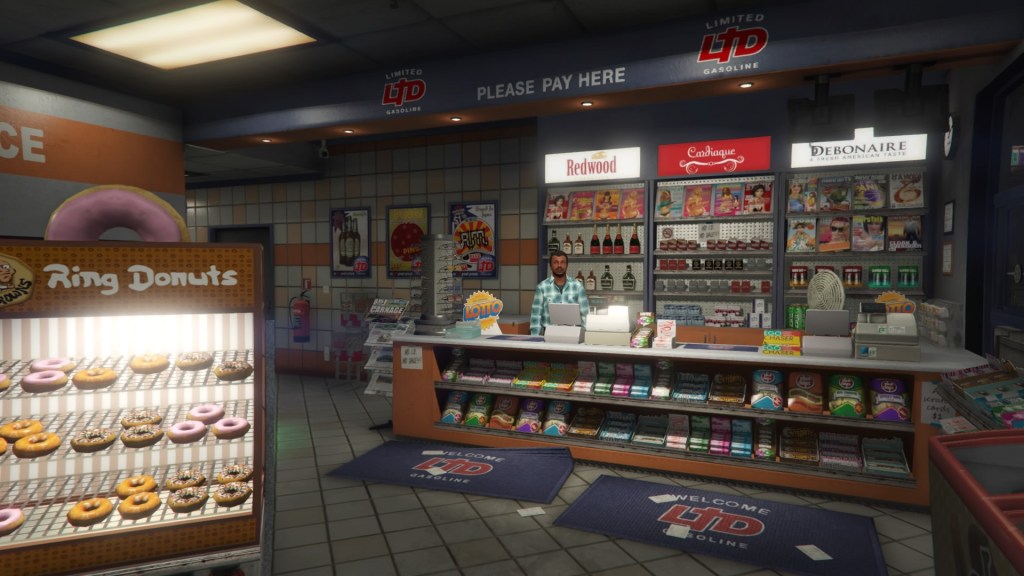
This is a free activity. While this activity can be a bit more on the fun side, it isn’t without its downsides. The difficulty isn’t so much with holding up the store, but that the maximum money you’ll get from each store is maxed at around GTA$1,000. That amount of money almost seems not worth the hassle, except there are 19 stores that you can hit up around the map to net somewhere close to GTA$19,000 per day. Not the best haul in this list, but it’s decent.
Cost: Free
Type: Active Income, Daily, Recurring
Reward: Up to GTA$1,000 per store with 19 stores
Difficulty Level: 3 (Mostly easy, but will need a decent getaway car)
⤵
5. Gang Attacks

Gang attacks appear as a large red circular area on the mini map and full sized map. These activities have you take down a bunch of thugs in that area. Upon successful gang attack completion, you receive 500 RP. Where you make your payout here is looting all of the gang bodies and the weapon crates. Gang members may drop between GTA$20-50 each. Each weapon crate drops GTA$500. Most areas have around 5 crates or more. The crates can total at least GTA$2,500 + whatever money you can loot off of the gang members.
Cost: Free
Type: Active, Daily, Recurring, Multiple map areas, Time Suck
Reward: ~GTA$2,500 + loot + 500 RP * ~36 Gang areas on the map >= GTA$90,000 per day
Difficulty Level: 6-8 (Medium hard, requires ammo, decent shooting skills and persistence)
⤵
6. Visit the Casino Cashier
This one offers free money every day. Visiting the casino cashier allows you to pick up 1000 visitor bonus casino chips every single day. You can cash these chips out to GTA$ at any time. This one is down the list because it doesn’t offer a lot per day, but it is free money with no catch. Like the Lucky Wheel, this one also takes a full 24 hours before it resets. If you do this one just after spinning the wheel, the Lucky Wheel timer can be used to cover both activities.

Cost: Free
Type: Recurring, Daily
Reward: 1000 chips daily or GTA$70,000 every 7 days or GTA$300,000 every 30 days
Difficulty Level: 1 (Easy)
⤵
7. Freemode Events
To participate in Freemode events, you’ll need to play in public servers. Private servers of any type do not spawn Freemode events. These events are random in type and require specific things, like opening a parachute closest to the ground. Whomever does this the best gets first place and the highest prize.
Cost: Free
Type: Multiplayer, Recurring, Random throughout the day
Reward: GTA$18,000+ to a little more than GTA$20,000
Difficulty Level: Depends on the event and how many participate
⤵
8. Hidden Caches

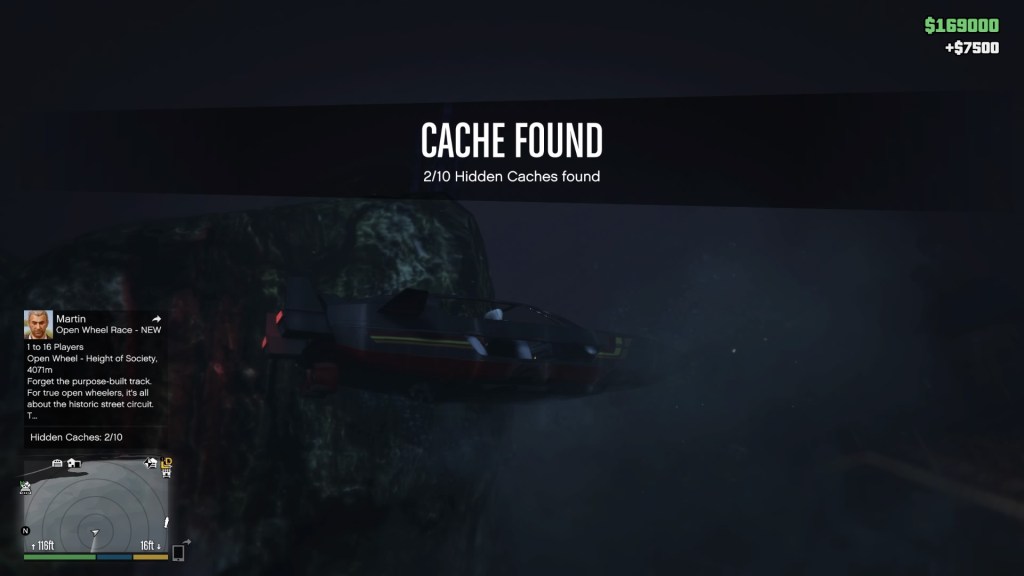
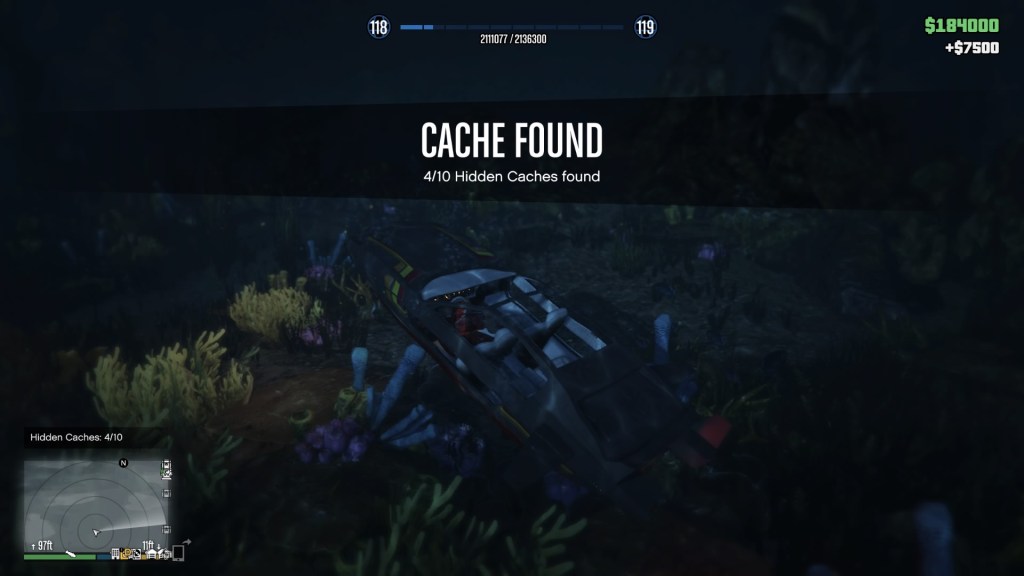
Here’s another treasure hunt that was introduced as part of Cayo Perico. This is similar to the treasure hunt that’s also available on Cayo Perico Island (see below), except this hunt is much, much better for GTA$ and doesn’t require purchasing the expensive Kosatka Submarine. In this case, there are 10 hidden caches to find and because there are so many and because these caches can be found daily, it’s makes the list at spot 8. However, there are 100 locations from which those 10 caches can spawn, making it a medium difficulty event. This means you’ll need to check a lot of different locations to find all 10. The caches can be picked up inside or outside of a vehicle. This means you can use an underwater vehicle, like the Toreador, if you have one or you can use a scuba diving suit, your choice. If your vehicle has a sonar (i.e., you have bought the Kosatka), the sonar will make it somewhat faster to find all 10.
This one rewards GTA$7,500 and 500 RP for each cache found. Finding all 10, you will net GTA$75,000 and 5,000 RP. The caches reset daily, allowing you to pick up that GTA$75,000 each day. In 7 days, that’s GTA$525,000. In 28 days, that’s GTA$2.1 million. That’s a lot of GTA$ to get if you do it every day for a month. In fact this one is far easier than doing the Daily Objectives and awards more GTA$ in 28 days, though less RP at 140,000.




Cost: Free
Type: Daily, Recurring
Difficulty Level: 5 (Medium — must be tenacious)
Reward: GTA$7,500 + 500 RP per cache (10x = $75,000 + 5,000 RP per day)
⤵
Income which requires a purchase….
Here are the final two of our top 10, but these require buying properties to gain a daily income. These final two are included in this top 10 list because these are the only properties you can own in GTA Online that produce truly passive income.
Update: There has been one new property added that also adds passive income, although very little per day at around $500. This new property is the Agency. This is the Franklin Clinton and Partner property. It isn’t included in the top 10 because these two below are still the highest paying for passive income in the game. The Agency’s passive income is too low to be of any real value. The game claims that if you do Security missions that the daily income increases. Unfortunately, I’ve not found that to be the case. I’ve done at least 20-30 of the Security missions and the daily income remains at a low $500 per day.
⤵
9. Nightclub Promotion

As of June 2022, the daily nightclub payout has been increased to GTA$50,000 per day. The safe capacity has also been increased to GTA$210,000. Nightclub ownership activities have now moved into the top spot for residual income from a property purchase.
Because this activity still requires investment, it has moved up one place to 9. However, because of the GTA$50,000 per day income, owning a nightclub is now the #1 activity to do once you can afford this property purchase. In other words, this is the recommended first property to purchase (after buying an executive suite to be CEO) and to milk for cash once you have grinded enough GTA$ from the top free list above. With this new increased in-game daily payout, in 4 hours of play, you can earn GTA$200,000 for mostly doing nothing.
Owning a nightclub is a property type that you must purchase before you can reap the passive monetary rewards. However, this property comes with a catch. To make the maximum money per day (GTA$10,000 now raised to GTA$50,000), you’ll need to complete various Nightclub management missions. These activities promote the nightclub and keep the club full. So long as the nightclub remains full of people and the popularity progress-bar is filled, the nightclub will earn you GTA$50,000 per day doing next to nothing. As the club popularity decreases and the popularity bar dips, so does the income. However, you will also need to invest in the nightclub security to drastically slow down the loss of income each in-game day.
Like arcades, nightclubs cost around GTA$1.5 million depending on the property. However, once you own it, it is guaranteed to generate some amount of passive income. If you do nothing and choose not to promote the club, the club still produces a minimum amount of passive daily income, maybe GTA$1,000 per day or possibly higher.

You’ll also net various amounts of GTA$ from 2,500 to 5,000 for each successful promotion activity completed, such as putting up posters yields GTA$5,000 and a small amount of RP on completion.
Note that to run nightclub missions, you need to become CEO, which also costs GTA$. To become CEO, you’ll need to buy an Executive Office or pick one up in the Criminal Enterprise Starter Pack. Becoming VIP or MC might also work, but these also cost GTA$ to buy into.
Cost: GTA$1-2 million depending on property + GTA$1-2 million for Executive Office to be CEO
Type: Active or Passive Income, Daily, Recurring
Passive Income: GTA$50,000 per day down to GTA$1,000 per day depending on popularity.
Mission Reward: GTA$2,500 to GTA$5,000 + RP depending on promotional activity
Safe Capacity: GTA$210,000
Difficulty Level: 1 (Easy) to 3 (Medium) depending on activity
⤵
10. Arcade

Owning an arcade requires buying it with GTA$. The cost to buy an Arcade is around GTA$1,300,000. However, Rockstar regularly puts properties on heavy discount throughout the game. At a 40-50% discount, you might spend as little as GTA$500,000 to get a property.
Sometimes you can even get some properties included in a bundle or possibly free from Rockstar promotions. Bundles such as in the Criminal Enterprise Starter Pack (CESP), which costs somewhere between USD$10-$20, includes a bunch of properties, weapons, vehicles, outfits and tattoos… including a bonus of GTA$1,000,000. This bundle might also be included with the purchase of certain game versions. Take advantage of freebies included with such bundles if you can afford them.
For example, the CESP bundle includes the following properties:
- Maze Bank West Executive Office — No Garage w/o GTA$
- Paleto Forest Gunrunning Bunker — 1 Car Garage
- Senora Desert Counterfeit Cash Factory (must be a motorclub president)
- Great Chaparral Biker Clubhouse — 17 Bike Garage (10 for you, 1 each for 7 members)
- 1561 San Vitas Street Apartment — 2 Car Garage
- 1337 Exceptionalists Way — 10 Car Garage
However, CESP doesn’t include an Arcade property. Take advantage of the property discounts when they roll around each week, which may include discounts for an Arcade, a Hangar and Nightclub properties.
Keep in mind that owning properties isn’t without cost. Every property you buy has a daily payment that is subtracted at the end of each game world day from your GTA$ (about every hour of play). This means that you won’t make exactly GTA$5,000 per day… it’ll be more like GTA$4,500 after daily expenses are subtracted for that specific property. You will see the full GTA$5,000 deposited into the safe and the daily expenses are subtracted separately.
However, you don’t have to do anything to get that income. It rolls in without even being there and I’m not even sure you have to buy arcade machines either. Just be sure to stop by and pick the money up before the safe fills up. Yes, you must stop by the arcade to pick it up. You also have to remain online for a full in-game day for the money to show up.
Finally, it’s worth noting that unlike GTA V, you cannot own multiple businesses like arcades or nightclubs as you might expect. In GTA Online, you can own one of each type of business property including the executive office, arcade, nightclub, hangar and motorcycle clubhouse. Garages and apartments are the exception which you are allowed to own up to 6, excluding garages attached to businesses like the executive office, casino penthouse, arcades, nightclubs, bunkers and facilities. For completion’s sake, you can also only own one each of these vehicles including the Super Yacht, Kosatka, Mobile Operations Center, Terrorbyte and Avenger.
If you attempt to buy a second “one-only” property or you’ve used up your 6 slots, the game will apply credit from your old property towards your new purchase so that you only pay the diffence in price between the first and second. If the new property is less costly than the old one, you’ll get money back. Note that freebie properties might not offer a trade-in allowance towards a new property.
Cost: Minimum GTA$1,300,000 for Arcade (may be able to get one free)
Type: Passive Income, Daily, Recurring
Passive Income: GTA$5,000 per day
Active Income: None
Difficulty Level: 1 (Easy)
⤵
Runners Up
Here are some other runner up events and activities that didn’t make the top 10 but are well worth considering. Note, the Payphone hit payouts have been reduced from GTA$85,000 per hit to GTA$50,000 per hit after the 2022 Summer update. Rockstar has seen the error of their ways and reinstated the GTA$85,000 per hit reward.
⤵
Franklin’s Quests (First Runner Up)
[Updated 7/26/2022] After the 2022 summer update (July), Rockstar has lowered payouts for Payphone hits to GTA$50,000. The GTA$85,000 reward recently reinstated for payphone hits. This means payphone hits are back to being an excellent money making opportunity in the GTA Online.
I’ve been thinking a lot about this recent addition and I’ve come to the conclusion that this Agency addition is way better than I had originally thought and is pretty much better than any other update for money making purposes. In fact, it’s so great, I would bump The Agency update into the number 10 position if not for one thing (well, a couple). It costs a LOT of cash to buy an Agency plus it costs to buy an Executive Suite and it offers very little passive income in return per day. The passive income isn’t where you make money.
It’s the Payphone Hits which can definitely net a crap ton of GTA$ in very little time. In fact, Payphone Hits can make you so much money so rapidly, that it will pay for the cost of the Agency property in ~30 Payphone Hits (less when they boost the return). After that payback time, it’s all profit. With Payphone Hits, you can make around 6 hits per hour. Meaning, in about 5 hours of doing nothing but Payphone hits all returning $85,000 per pop, these will completely pay for the Agency.
[Updated: 3/11/2022] I’ve been remiss in updating this article, but here’s the 2022 update including Franklin’s new quests. Franklin’s quests cost around GTA$2.2 million because you have to buy into the new Agency property. Like the Auto Shop addition just before this one, you must pay to unlock the Franklin quests by buying a property. For that money and property, however, you will also unlock 20 new garage spaces. If you’re like me, forever running out of new car spaces, getting a new 20 car garage is a pretty sweet deal. However, it also means shelling out around GTA$2 million… a lot of grinding.
The biggest deal unlocked with Franklin’s quests, besides the property, is Dr. Dre’s quests. Though, Dre’s quests aren’t the best way to make money from this update. No, it’s the Payphone Hits!
Dr. Dre
I’m including the Dr. Dre quests here because it’s technically part of Franklin’s quests. Dr. Dre’s quests only unlock after you run at least one Security mission, which requires being a CEO, MC or VIP.
However, know that Dr. Dre’s quest line is like the Heists… effectively one time, but restartable. Yes, you can do them over again, but must start from the beginning. The haul for these quests is decent, but I don’t at all recommend these for ongoing money making opportunities due to the complexities of Dre’s quests. For each mission, you’ll earn GTA$100k. For completing the entire Dr. Dre quests, you’ll earn GTA$1 million. It’s a decent haul, but the missions are not simple and may require trying multiple times if you’re doing it alone. These quests are also easy to fail.
Cost: GTA$2.2 million to buy an Agency PLUS Buying a VIP, CEO or MC property
Type: Not Free, Restartable One-Off
Reward: GTA$100,000 per mission + GTA$1,000,000 for completing them all
⤵
Agency Security Quests
These missions require that you to become a CEO, VIP or MC to complete them. This means you will need to purchase a VIP pass, a Motorcycle Club (MC) or an Executive Suite (CEO) before you can run these. One of these costs around GTA$1 million to GTA$1.5 million depending, but you only need one. This is in addition to cost of purchasing the Agency to get access to Franklin.
Franklin offers your character multiple types of agency Security Missions from protecting supplies, to stealing items, to protecting a person, to stealing vehicles. Each of these missions earns you a random amount of GTA$ decided by the computer system on your Agency desk. Whatever the computer says the mission will earn, that’s what it earns. It typically ranges from about GTA$33k to GTA$64k. It depends on the mission and what the game decides that mission is worth.
The Agency Security Missions are decent hauls, but the missions can sometimes go south easily. If you fail a mission, that mission disappears from the computer and cannot be repeated. It will be replaced with a new mission, usually offering a much smaller haul. Because of the randomness with these agency quests, the complexity of them combined with the ease for which they can fail, I don’t recommend these for ongoing cash grabs in the game. There’s also a cooldown timer between each quest.
You can do them, but know that they aren’t always worth the time and effort for the money return involved. Do them for fun, not for profit.
Cost: GTA$2.2 million to buy an Agency PLUS Buying a VIP, CEO or MC property
Type: Not Free, Recurring
Reward: GTA$33k to GTA$64k
⤵
Payphone Hits
These quests are where the GTA$ are. Not only do Payphone hits not require being a CEO, MC or VIP to run them, when you complete the Bonus, you will get an extra GTA$70,000 for a total of GTA$85,000 for each successful hit completed. You can even run these in Invite Only Sessions to avoid interaction with other players. Because there’s no limit in how many you can do of these in a day, doing 10 will net you GTA$850,000. Doing 12 will earn you, GTA$1,020,000. Keep in mind that it takes a minimum of about 10 minutes per hit, that means it will take you about 120 minutes (2 hours) to earn GTA$1 million. There is a cooldown timer on these hits, but this can be avoided if you save immediately after receiving your cash by changing your outfit, then killing and restarting the game. However, doing this means you have to wait through the very long game restart process (around 4 minutes to load and another 2 minutes to get online). After that, it takes another 4 minutes to complete a hit. That totals right around 10 minutes per restart and Payphone Hit. This means you can complete about 6 per hour netting you $510,000 per hour of play.
Occasionally, Rockstar increases this bonus by 50% earning you GTA$105,000 as Bonus and GTA$22,500 for base fee, for a total of GTA$127,500 per successful hit. This will net you GTA$1 million a whole lot faster (in about an hour).
Hits consists of 5 types:
- The Cofounder — This type of hit requires you visit a motel, wait for him to check out, then perform the action required to take him out such as a sticky bomb on the car or using a scoped weapon to blow the engine.
- The Tech Entrepreneur — This type of hit requires a taxi cab. You pick up a cab at the designated location, then drive the Tech Entrepreneur to the location required and do the deed by drowning or the scrapyard.
- The Judge — This type of hit requires visiting the golf course. You will do away with her by golf club, running her over with a cart or blowing her up with a sticky bomb.
- The Popstar — This type of hit requires you to chase the popstar in the car and take them out with a specific method, like chasing them in a cop car to intimidate them, taking them out Vagos style with a driveby or using a truck cab to ram them into submission.
- The Trolls — The Trolls are 4 hits. You must visit all 4 locations and take out the trolls with various criteria, such as in 7 minutes, using headshots or running them over in a vehicle.
- The CEO — This mission requires taking out a CEO playing construction worker. The mission will require you to use various construction equipment to take him out, like blowing up a gas tank, dropping a container on him or triggering a dozer to run him over.
Two additional missions exists, but only if you are logged in as a CEO or MC and have two people. All of these missions are most easily launched by calling Franklin from the contact on your phone. Though, you can also wait until Franklin randomly launches one. Using the phone makes these missions the fastest to get started, because you don’t need to visit the Agency computer at the office.
Note, for missions that require you to pick up a taxi or police cruiser, you don’t need to wait for the message. Go to the taxi location near the Casino or to the Chili restaurant or similar. For the police cruisers, they will spawn sometimes at a location closest to the Popstar’s car. Though, not always. Once you locate a cruiser, you may find yourself driving all over Los Santos go get to where the Popstar is.
Bugs exist here. If you are using a Deluxo, any Trolls Bonus will fail if you accidentally run them over in that specific car. Meaning, if you are given the criteria to run the Trolls over in a Vehicle, don’t do it in a Deluxo. Choose another car. However, even if you’re running a different Bonus requirement and accidentally run a Troll over in the Deluxo, that bonus will also fail even if unrelated. This bug has been reported. Note, this issue may affect all types of special weapons vehicles like the Toreador and the Stromberg.
Bugs in the GPS leading to the Scrapyard (The Tech Entrepreneur) and the door of the Von Crastenberg Richman (also The Tech Entrepreneur) is inaccurate. If you follow the GPS, it will lead you incorrectly. You will need to find these two locations on your own and remember how to get there when these mission requirements appear.
A bug exists with The Judge missions. All of The Judge missions occur at the golf course. If you fail to change into the Golf Outfit and Golf Club, the mission bonus will automatically fail even if you successfully do what the bonus requires.
A bug exists with The CEO. If you accidentally wander too close to the construction site, this will disrupt The CEO’s walking path. Once this occurs, there’s no way to recover to receive the bonus. He simply won’t resume his walking path once disrupted. In fact, any targets that follow a walking path will fail to recover that walking path if they are disrupted. However, some targets that lose their walking path can still see a successful bonus, it’ll just be a whole lot more difficult. However, The CEO will fail the bonus because he won’t line up with the requirements.
One last thing about these Payphone Hits is that they’re not all equal in time and effort. Some hits are way more complex than others. For example, one of the Popstar hits requires taking him out in drive-by style using a Vagos wagon. Shooting while driving in this game is, at best, a miss affair. While it is possible to do it, it’s not easy nor is it accurate. Another more complicated hit is The Judge hit that requires taking her out with a sticky bomb planted somewhere close to her on the golf course. That’s next to impossible to do. Anytime you get close to her and take out any kind of weapon, her goons start firing on you. That spooks her and she runs away, failing the “sticky bomb” Bonus. If she runs away with either of the other requirements, it is possible to get the bonus. When these overly complex missions appear, I kill the game instantly and try again. There’s no reason to do these complex missions when most of the rest of the missions are straightforward and relatively easy.
Complicated Hit Example
As an example of a complicated and time consuming hit, one of the The Judge hits requires you do it with a sticky bomb at a specific hole on the golf course. This one is so specific about where and how you must do it, you are required to know the golf course like the back of your hand. The one thing Rockstar forgets is that even if you play the golf course through, the game takes control over which hole you’re on and automatically transports you to the next one after completion.
You don’t get the benefit of actually walking from hole to hole yourself. This means that even if you play the golf course, you still don’t get to know the course. You get to know the holes specifically, but not where they are located on the property. To run this specific sticky bomb mission, that means you’ll need to spend time at the golf course learning exactly where each of the holes are, how they are laid out and how to get to each one of them. That’s something you must do on your own, wasting a lot of time in the process. Oh, and once you get onto the property, knowing which hole is which is not terribly easy to determine. As I said above, some hits are way more complicated and time consume than others. I don’t even get why Rockstar would think people could actually perform this hit. Yet, it’s included in the batch of hits. I always drop from this one when it appears. I don’t have the time to scour the golf course to find exactly where hole 3 is or hole 6 or any other hole.
Cost: GTA$2.2 million to buy an Agency (may require VIP, MC or CEO first time to unlock)
Type: Not Free, Recurring
Reward: GTA$22,500 to GTA$85,000 each hit depending on bonus success
The best of all of the above are most definitely the Payphone hits. However, I can’t remember if the game requires completion of at least one Security contract and/or Dr. Dre’s missions to unlock the Payphone Hits. If so, that means you will need to invest in CEO, MC or VIP to unlock these Payphone Hit missions. I’m assuming it does. These expensive investments is why the Franklin missions failed to make the top 10, even though the Payphone Hits net a lot of GTA$ quickly.
For the Payphone Hits alone, however, this is the reason the Franklin section has been placed immediately below #10 as the first runner up.
⤵
Auto Repair Shop + Los Santos Car Meetup

This brand new addition arrived as of July 20th, 2021. Two new features have been introduced into GTAO. The first is the Los Santos Car Meetup. This is a large warehouse building where players can meet and show off their cars, but unfortunately only one car at a time. As you show off and mod your car, your Meetup reputation points will increase. These reputation points are separate from standard RP. There are 32 parking spaces in the warehouse where cars can be parked. There’s also an indoor track that can be raced. The second is the Auto Repair shop, which you have to buy.
To begin this whole deal, once you get inside of the meetup building, you’ll meet with Mimi (the organizer) who introduces you to Sessanta and KDJ. Sessanta and KDJ want to open an auto repair and modification shop with you. However, Rockstar leaves it up to you to buy this new business location in the game. To buy an auto repair shop, you’ll need to visit Maze Bank Foreclosures. Here, you’ll find several locations which you can purchase. As of now and with Prime Gaming, one of the locations (Strawberry) is free to obtain, the rest cost around GTA$1.5 to 1.9 million. If you have Prime Gaming, grab the freebie now before Rockstar kills the promotion. Without Prime Gaming, you’ll have to pay.

Once you own an auto repair shop, like most other Heist operations, there’s a contract job board. To access it, you’ll need to become a CEO. Here’s the expensive catch.
To become CEO, you’ll need to own an Executive Office Suite (~GTA$1,000,000, see below OR ~USD$20 to buy the Criminal Enterprise Starter Pack, see Arcade above). See, I told you that Rockstar gets you to spend massive amounts of GTA$ all over the place in this game.
The first job given by Sessanta is to rescue Sessanta’s car from the impound lot at the police station, the same car you first saw her in at the meetup. This is a fairly difficult mission because you have to mow down a bunch of cops at the impound lot. However, as soon as you arrive there, you get a 3 star wanted rating causing even more cops to swarm. Suffice it to say, you’ll need to grab the car as fast as possible and attempt to lose the wanted status quickly. Once you do this, bring it back to the auto repair shop and the actual jobs begin on the job board.
There are three ways to make money with the auto repair shop. The first is to perform the job board contract jobs. The second is to wait for customers to arrive to have their cars repaired and modded. The third way is to complete one contract to unlock specific wanted cars to jack and return for GTA$, like Simeon’s request above. Here’s where the second way gets convoluted.

Repairing and modding cars forces you to pay out some amount of GTA$ from your own pocket which will get reimbursed by the customer plus their service fee on top. I’ve done two of these. The first one was -GTA$50,000 to repair and +GTA$30,000 as the car repair payment, for a total of +GTA$80,000 once the car is delivered. The second car was -GTA$20,000 to repair and +GTA$20,000 as payment, for a total of +GTA$40,000 once delivered. If the car is delivered damaged, the game reduces the amount you get paid. You’ll need to have at least GTA$100,000 in your account if you intend to run these repair jobs.
However, Rockstar failed us with this new feature because I’d like to have an Open sign that I can turn on and off. If I don’t want the jobs to appear at all, I’d like to turn off the Open sign and prevent Sessanta from calling me with new jobs.
As for the contract jobs, KDJ takes a 10% cut of whatever payment amount is offered. Note that all of the contract jobs are reasonably complicated and difficult to complete when playing solo. However, they can be completed solo, but you’ll have to play them multiple times learning strategies via trial and error. The three jobs that appear for me are as high as GTA$185,000 and as low as GTA$170,000. I have personally confirmed that KDJ’s cut is, in fact, 10%. You definitely will not get the amount listed on the job board. For a GTA$178,000 job, I got GTA$160,200 + another $75,000 about one minute later for some odd reason. Maybe Rockstar is offering up a bonus for the first contract completed? *shrug*
For car repairs and mods, you do get the full amount listed on the job order. You just have to be sure to follow the instructions on the bottom of the screen to do exactly what the customer requests. If you choose to place random mods on the car, the customer likely won’t pay you for them. Also, if you choose not to hire a tech, you’ll have to deliver the cars yourself. If you hire a tech, you’re going to see a higher daily fee to pay the staff at the auto repair garage. These jobs appear several times in the same day. These are not limited to one repair per 24 IRL hours… yet. If you buy a second lift (GTA$650,000), you can repair two cars at the same time and double your income.


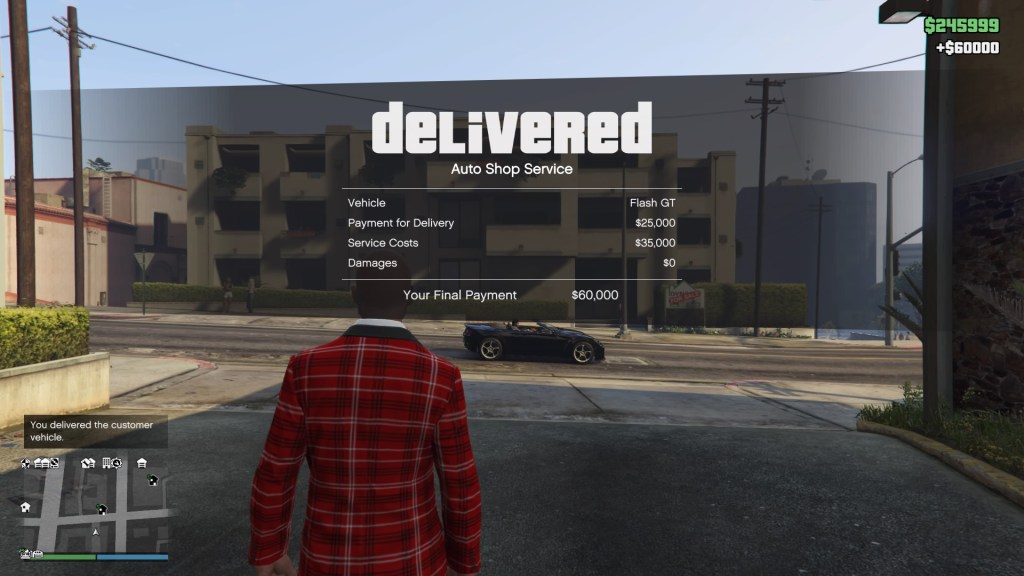

Note that the auto repair shop doubles as a new 10 car garage. Getting a new 10 car garage for free (with Prime Gaming) is a pretty sweet deal. Also note that if you buy any add-on decorations for the auto repair shop, they will not show up until you complete Sessanta’s first mission to rescue Sessanta’s ride from the impound lot (assuming everyone gets this same mission as the first mission).
There’s also one more way to make additional GTA$ from the auto repair shop:
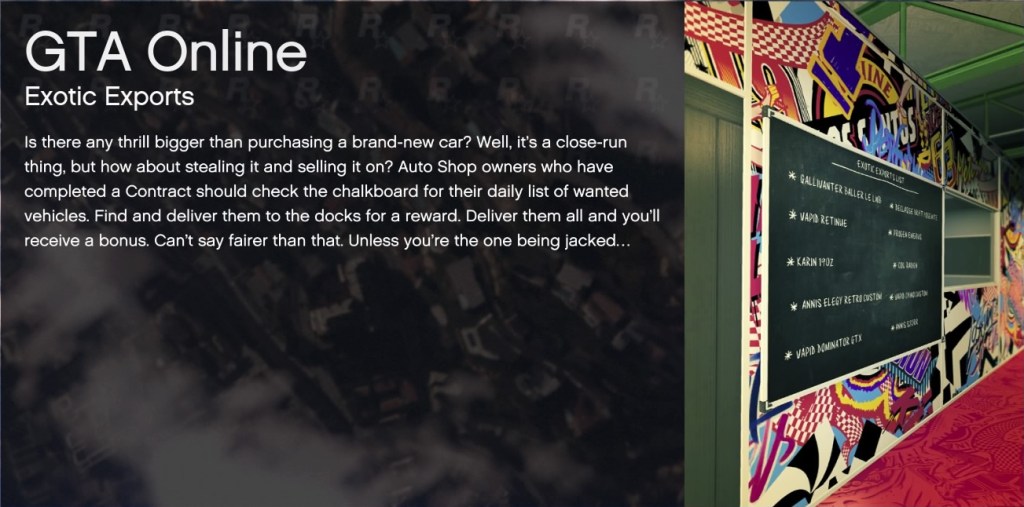
Once you have completed at least one contract from the board, the game unlocks a list of wanted vehicles that can be searched for, jacked and sold in similar form to Simeon. I’m not yet certain what the payouts for these are, but since you’re delivering to the docks, it is likely the same payout (max GTA$20,000 per car) as it is for Simeon… and this is probably the reason Simeon’s payout dropped. In fact, it is the same payout amount (GTA$20,000) as you get from Simeon’s car request. It does say you get a bonus if you deliver all on the board, but this is almost impossible to do. This also illustrates why it’s important to read the loading screens.
Difficulty
Attempting to locate each of the 10 cars each day is about as easy as completing the Daily Objectives for 31 days. Some cars are highlighted with a blue dot on the minimap. Cars that are “standard spawn” must be found and jacked in the normal way. Because of this harem-scarem means to locate the cars, you can’t rely on any one specific method. It also means you have to be super great a spotting specific cars by make, which is tricky enough in itself. Waiting for the blue dots for the ‘special’ cars to show up is near impossible. In fact, because other blue dots show up which aren’t related to this, you can literally spin your wheels doing unrelated tasks. Rockstar has made this task as difficult as possible and only 24 hours in which to complete it.
It’s great that this chalkboard car search is daily in that you the chance to get up to GTA$200,000 (plus bonus if you get all 10) per day doing this, but you can spend many, many hours looking for those 10 cars. Worse, the chalkboard can change out from under you when those 24 hours are up without you knowing… all while searching for a car that’s no longer on the board.
Note also that Simeon’s car quest and the Auto Shop car quest can conflict, requesting the same vehicle. This means you’ll need to make a choice to whom you intend to deliver. It also means that you’ll need to find that same car a second time for whichever one you didn’t fulfill. This is frustrating. Sometimes you find cars for both Simeon and the Auto Shop at the same lot. Again, you’ll have to choose which car to jack and deliver. The problem is, when you come back, the game will have despawned those other cars and respawned something else. That means you’ll have to go looking again. Also frustrating.
Tricks
One trick that sometimes works in finding one of the 10 cars is going in and out of the garage at the casino. When you enter the garage and then exit, the parking lot will respawn with all new cars. Occasionally, a blue dot will spawn there in the parking lot. The blue dot sometimes spawns in a space to the right of the the exit across from Downtown Cab, Co. This is probably the fastest way to get the parking lot to respawn with new cars. That doesn’t mean you’ll get a blue dot, but occasionally you might.
Bugs
There are a number of bugs with the auto repair shop. If you drive a car into the garage, you will be unable to repair a waiting car or even repair your own cars. The controller option never appears. You’ll need to exit the shop by walking out, then reenter to fix this problem. Another bug has just surfaced today, July 24th, 2021. If you attempt to deliver a car and enter the yellow ring, the ending does not complete. With this one, I thought that killing and restarting the game might help. It doesn’t. When I did that, the car was back at the repair shop awaiting delivery again. I tried delivery for a second time that took me to a new location, but the car still wouldn’t deliver. It seems that the game progress gets stuck when you can’t deliver the car.
Not getting jobs? Don’t stay inside of your Auto Repair shop or Sessanta can’t text you to give you car repair jobs. The game seems intent on avoiding refreshing the Auto Repair shop (required to put a car on the lift) with you in it. If you’ve been wondering why you haven’t been called for repair jobs and you’ve been working in the repair shop, that’s why. Also, you can’t cancel contract jobs while inside of the Auto Repair shop. To cancel a contract job, you need exit to call Sessanta. You can only call her outside of the repair shop. If you try to call Sessanta inside of the shop, you’ll get a busy signal.
There’s also some dumb logic when performing repairs… for example, the customer might request Secondary color bumpers or Secondary hood options, yet there’s no way to paint the car with a secondary paint job. All cars currently paint all surfaces the same color even if the car supports primary and secondary paint colors. What’s the point in requesting ‘secondary’ anything if you can’t paint the car with a secondary paint?
Blue dots and chalkboard cars bug. I’ve had this bug happen to me almost every single time I’ve played. I’ve found up to 6 cars on the chalkboard, but as few as one. Yet, after traversing the entire map from top to bottom, the game will not reveal any further cars via blue dots from the board. Even if the remaining cars are specialty cars that require a blue dot, no blue dot ever spawns anywhere on the map. This bug makes it impossible to complete collecting all 10 of the cars on the chalkboard.
Cost: Property is Free (with Prime Gaming) + cost of whatever decorations added to Repair Shop
Type: Mission Based + Intraday Recurring car repair jobs,
Passive Income: None
Active Income: Job based (around GTA$100,000 or so), Car repair (GTA$20,000 to GTA$30,000) per car
Difficulty Level: 3 (Somewhat difficult)
Daily Cost: Minimum GTA$250, more with staff
⤵
Rockstar Newswire and Loading Screens
Each week beginning on Thursday, a new Rockstar Newswire is released offering all of that week’s newest promotions and activities. Many of these activities also appear as messages on the loading screen.
Be sure to read each of these loading screens carefully. For example, the week this article is written, Rockstar is offering 2X GTA$ and RP on new survival map challenges. Participating in these new survival events during this week will earn you 2X GTA$ and RP plus a bonus of GTA$100,000 simply for participating in a Survival. Reading these screens closely can help you nab $100,000 or more simply by doing whatever Rockstar is requesting. Usually, it’s not hard to do what they’re asking you to do.
However, sometimes Rockstar might require the purchase of a Mobile Operations Center, a Terrorbyte or an Avenger, which can negate the GTA$ bonus. If you know you don’t have the vehicles needed to get the bonus, then skip it. By simply being required to participate, such as the Survival Challenge above, its easy to nab that GTA$100,000.
Type: Free
Difficulty Level: Depends, usually easy
Reward: Depends
⤵
Daily Objectives
This free activity is just barely a runner up because while the payout is big, it is incredibly difficult and you need to be level 15 or higher. However, you can make some serious bank if you’re tenacious. This one requires performing 3 Daily Objectives for 28 consecutive days. Some of the objectives can be extremely obscure, difficult to do, take a lot of time, dependent on challenges that may not appear and/or require loads of cash to complete (like Complete a Heist Setup). For these complicated reasons, it’s not included in the top 10. If you’re tenacious and willing to attempt the objectives each day, you can earn some serious bank after 28 days. If you miss a day or cannot perform one of the objectives, you lose the streak and must start over. To perform each daily objective, you’ll need to read the objectives closely.
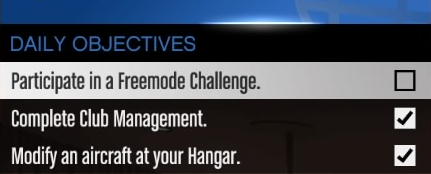
Note that you can effectively change two of your three daily objectives by launching into GTAO, then immediately checking your current objectives in the character menu. The bottom two are not set in stone if it’s a new day. If you don’t like the bottom two objectives, kill the game and restart.
Keep restarting the game until you get two objectives you can perform, like Visit the Casino OR Relax in a hot tub OR Mod a car. Once you’ve got two objectives you like, modify your character’s appearance by wearing glasses. This will force a cloud save and lock the objectives in. Make sure to read the Daily Objectives closely, otherwise you might be stuck with objectives you cannot complete. Don’t hesitate long. You’ll only get a few minutes before the game automatically performs a cloud save and then those objectives are locked in for that day.
The topmost objective is always set in stone for the day by Rockstar. You’ll have to perform this one whether you want to or not. Examples. If you don’t own a hangar, you can’t perform an objective like Modify an aircraft at your hangar. Rockstar might also set the objective as Complete a Heist Setup. If you’re already past all of your setups, the only way to complete that objective is to join another player who hasn’t yet done it.
Progressive Rewards
- 1 day of objectives will earn you GTA$30,000 and 5,000 RP (28x = GTA$840,000 + 140,000 RP)
- 7 days (week) worth will earn you GTA$150,000 and 20,000 RP (4x = GTA$600,000 + 80,000 RP)
- 28 days (month) worth will earn you GTA$500,000 and 50,000 RP
In 28 days, you earn (D) GTA$840,000 + (W) GTA$600,000 + (M) GTA$500,000 = GTA$1.94 million + 270,000 RP
As implied above, some objectives can appear that are impossible to complete either because you can’t afford to buy something or because you’re past that part of the heist. This can cause failure when attempting to do this for 28 days, thus making this challenge quite difficult.
Cost: Free
Reward: GTA$30,000 to GTA$1.94 million depending on how many you perform daily + 5000+ RP
Difficulty Level: 10 (Hard) — requires performing challenges for 28 days straight, though you can still get the daily challenge reward even if you miss a day in between.
Level to Complete: Rank 15 or higher
⤵
Cayo Perico Treasure Hunt Challenge
This is a runner up because it requires significant cash outlay and is not super easy to do. However, it offers okay payout. This means that even though it will cost you a lot to unlock, you can keep doing these treasure hunts daily until you’ve recovered whatever it’s worth to you. Before I get into the hunt, let me explain the costs.
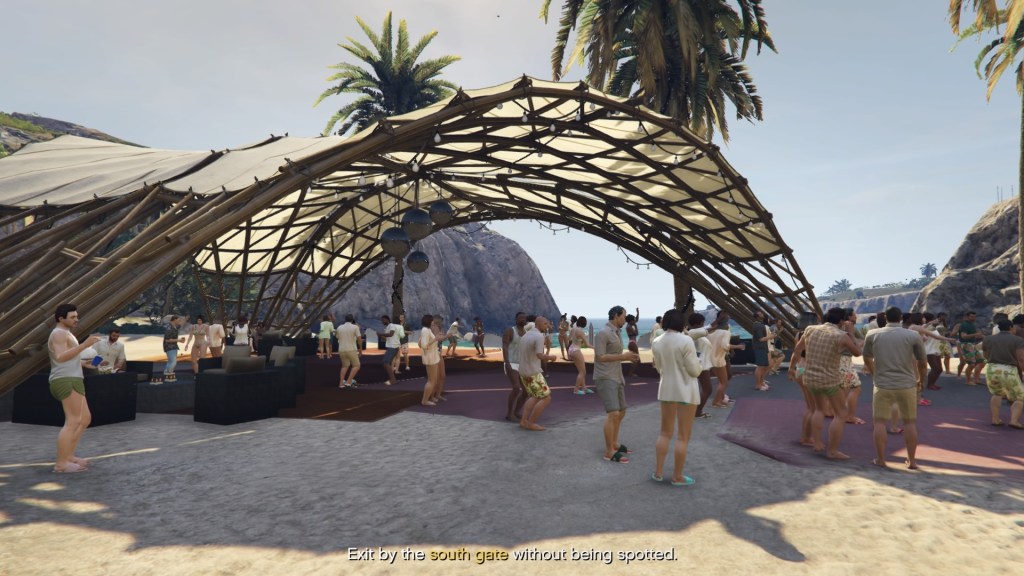
To unlock Cayo Perico Island, you’ll need to buy the Kosatka submarine from Warstock Cache and Carry to launch the mission to take you to this new island. This sub costs GTA$2,200,000 base price. If you wait for Rockstar to slash the price, you can get it for around GTA$1 million, which is what I paid when I bought it on sale. Because of the daily treasure hunt, it’s worth the GTA$1 million (on sale) investment to buy the Kosatka. Buying it for the Heist? Not so much.
Now, onto the treasure hunt. There are 10 possible treasure chest locations across Cayo Perico Island. There are 5 locations on land and 5 underwater, all dotted around the island. You’ll need to check many of the locations until you find the two available treasure chests. You can only open two per day. Opening up both treasure chests yields GTA$15,000 per chest for a maximum of GTA$30,000 per day. That’s a reasonable amount of GTA$ income, which is why it is included here.
Rockstar has even been known to 2X these daily challenges, doubling the GTA$ to 60,000 per day for up to 7 days.
Cost: Kosatka costs around GTA$2.2 million
Type: Active Income, Daily, Recurring, Time Suck Activity
Reward: Up to GTA$30,000 per day or GTA$210,000 every 7 days or GTA$900,000 every 30 days
Difficulty Level: 5 (Medium — must scout many locations to find two) … must be tenacious
⤵
Character Bounties
These are separate from the Bounty Missions described below. This activity costs nothing to the player and is somewhat easy to get. A character bounty is had when you steal a car and someone unknown puts a bounty on you. These are easy money and may be worth trying to get, but they don’t pay much and can be slightly difficult to find…. which is the reason it didn’t make the top 10. A bounty reward can range from GTA$1,000 to GTA$3,000. If you end up with a bounty and want that money, you’ll need to move to a private server so other players don’t try to collect on it. Then wait out one full in-game day on that private server (about an hour of play time). At the end of that day, you’ll be paid the amount of the bounty. You’ll need to play on a private server or with trusted friends until the bounty pays out.
Typically, these bounties will appear when you steal expensive cars parked on the side of a road. One vehicle that always gives up a bounty is the Sprunk Extreme van, which you can’t keep or own. This van is a trap and always issues a bounty. If you see this van, steal it, get the bounty and hide out on a private server for one full in-game day to collect the bounty. Though, there are plenty of other expensive cars which can also turn a bounty. The more expensive the vehicle is, the more likely the owner will put a high bounty on you.
Note that bounties hang around on your character until either another player collects on it in a public server or one full in-game day passes and you get the money. Also note that only one bounty can be active at a time. Can’t get greedy with this one.
Cost: Free
Type: Active, Recurring
Reward: GTA$1,000 to GTA$3,000
Difficulty Level: 1 (Easy, so long as you hang out on a private server until you get paid)
⤵
Good Sport
Here’s another runner up that didn’t make the grade, but is worth realizing that it exists. This one is a periodic GTA$2,000 that is given to the player for keeping up Good Behavior. I’m not completely certain what all triggers ‘bad behavior’ and prevents this award, but I believe it is related to the character’s mental state. If you start mowing down civilians on the sidewalk with your car, for example, this raises the character’s mental state and may forfeit the Good Behavior award. This one doesn’t seem to award once per day. It seems to award the player this money at random times while playing.
Cost: Free
Type: Active, Recurring, Unpredictable
Reward: GTA$2,000
Difficulty Level: depends on how you play GTAO
⤵
Sleeping Bums

This runner up is one that likely only shows up after you have visited Cayo Perico island. This, in turn, means you will need to own the Kosatka Submarine (see above).
How it works. Occasionally, the game will tell you that you have found a small key which is useful on Cayo Perico island. When you see this message, that means there’s a blue dot somewhere near you. Once you find the blue dot on the minimap, go to it and there will be a sleeping drunk bum. Loot the bum and you’ll get some GTA$. I’ve gotten up to GTA$7007 from looting, but the amount varies.
Cost: Requires Kosatka and visiting Cayo Perico island
Type: Random, Recurring
Reward: Varies, but can be up to GTA$8000 or possibly higher
Difficulty Level: 1 (Easy)
⤵
Amazon Prime Gaming
Owning this type of membership offers freebies each and every month. However, to gain this freebie, you’ll need to subscribe to Amazon Prime. If you own this membership, you’ll link your Rockstar account to your Amazon Prime Gaming account once and each month Rockstar will offer various freebies and discounts for this linkage.
For a while, Rockstar was offering up GTA$1,000,000 each month at GTA$200,000 each week with the fourth week culminating in a payment of GTA$400,000. Recently, this has been reduced to GTA$100,000 a week for a total of GTA$400,000 each month. I don’t know if the last week culminates in an extra $100,000 as there has been no mention of this by Rockstar. In fact, there was no mention of the reduction of this Prime Gaming benefit.
Cost: Amazon Prime membership (USD$12.99 a month or USD$119 a year)
Type: Passive only
Reward: Up to GTA$400,000 a month
Difficulty level: N/A
Caveat: This benefit can be discontinued or altered at any time by Rockstar without warning
⤵
Additional ways…
These didn’t make the cut for reasons listed below. However, they are still valid for making at least some money in the game. These events are free to participate, but may require the use of weapons, armor or the purchase of expensive cars (racing), specific ammo or expensive weapons to win.
Survival Events
I hesitate to include these events because they require crap tons of ammo (which you have to buy) and, in the end, net very little in the way of cash. In other words, you may spend more on ammo to win the event than you’ll get back from surviving it. However, I’ve included it because these jobs are open and available all of the time. You can join a survival job at any time. The longer you last, the more money you’ll make, but only to a point. Keep in mind that surviving a long time doesn’t necessarily net you more GTA$ in the way you might think. You’ll get whatever you get from the survival event, which includes both RP and limited GTA$, maybe around GTA$3,500 or so max.
Cost: Free
Type: Multiplayer Active, Recurring, Available all of the time
Reward: Depends on many factors, but usually no more than GTA$3,500 on average.
⤵
Racing

Racing events can net you some GTA$, but typically you’ll need a decently fast car if you hope to win and win max bank. This means either buying an expensive Supercar from Legendary Motorsports or being lucky enough to win one from the Lucky Wheel podium. Racing is included because occasionally Rockstar will introduce a new racing type into the game and to promote it, they will award GTA$100,000 or more simply by participating.
Cost: Dependent on car needed
Reward: Limited GTA$ depending on placing, but probably no more than GTA$5,000
Notes: Sometimes newly introduced events will offer a large award for participating.
⤵
PlayStation 4 Promotion
While Rockstar readies GTA Online for play on the PS5, they are giving GTA$1,000,000 each month to PS4 members who also have PlayStation Plus. In order to play GTA Online, you need PlayStation Plus for the network access. The way to obtain this money changed in April, now requiring each player to head to the PlayStation store to claim the GTA$1,000,000 on the first of each month until the PS5 version of GTAO becomes available.
GTAO on the PS5 may release as soon as August or September 2021, so this promotion may end very soon. This one is only included here now because it’s still active for a limited time. Note, if you’re logged into GTAO when you head to the store and claim it, you’ll have to log out and back in to see your GTA$ update.
Cost: Requires PlayStation Plus subscription and a PS4
Reward: GTA$1,000,000 monthly
⤵
Gambling at the Casino
This one is not included in the top 10 because casino gambling is too risky for several reasons. I didn’t include this one in the ‘avoid’ area below because it is possible to win. It also takes GTA$ converted to Chips to make a bet and you can easily lose it all.

The problem with winning in the casino is that Rockstar monitors large wins coming out of the casino. If Rockstar determines you cheated to win, they can take all of your money away or outright ban you from the game. Be careful when attempting to win large bets in the casino. For this reason, I don’t recommend trying to gamble at the casino other than with the smallest bets (i.e., less than 100 chips). Even then, play only a little, win only a little and walk away. If you press your luck and win a large pot, Rockstar may flag your account for cheating.
Cost: Chips to bet
Type: Recurring
Reward: Whatever you win
Risks: Can be suspected of cheating and lose all money or be banned from the game
⤵
One Off Activities
Rockstar includes a few one-off activities which are worth doing because you can net a decent amount of cash from each of them. These are not included in the top 10 above because they cannot be performed more than once.
Bounty Missions
A random NPC named Maude will ask you to help her with some bounties. As a result, you will receive GTA$300,000 and the Stone Hatchet for returning the bounties to Maude alive. Returning them dead yields less. There are 5 bounties to be had.
Cost: Free
Type: One off
Reward: GTA$300,000 + Stone Hatchet
⤵
Rampage

This next activity requires using the Stone Hatchet that you got from Maude’s quests. Once you kill 25 NPCs while in Rampage mode using the Stone Hatchet, you will receive GTA$250,000. You must do this rampage specifically with the Stone Hatchet. There are other hatchets in the game, but only the Stone Hatchet unlocks this reward. Make sure you have the correct hatchet equipped.
Cost: Free
Type: One off
Reward: GTA$250,000
⤵

Golden Revolver
This is a cross promotion for Red Dead Online. To receive the Golden Revolver, you’ll need to start with a treasure hunt email. This will lead you to 4 different clues which, if correctly decoded, will reveal a chest containing the Golden Revolver.
Once obtained, you can then jump right into the Golden Revolver headshot kills challenge. Once you have killed 25 NPCs with headshots using the Golden Revolver, you’ll receive GTA$250,000.
.
Cost: Free
Type: One off
Reward: Golden Revolver + GTA$250,000
⤵
Radio Signal Jammer
There are 50 radio jammers placed on various tall radio towers and buildings. This is part of the Casino Heist. These look like small black boxes with a red light and an antenna on top. These also beep so you can hear them at a distance. Once you destroy all 50 radio jammers, the game unlocks a person useful to the Casino Heist. That’s not really the money reason to do this challenge. By destroying all jammers you’ll net GTA$150,000 and 50,000 RP.
Cost: Free
Type: One off
Reward: GTA$150,000 + 50,000 RP
⤵
Avoid these activities….
Most of what’s listed below are one-time and/or overly-complex activities. This means that once you complete those specific missions, you either can’t do them again or you must start over from the very beginning and do all steps again. You can also participate as a team member in a friend’s unfinished heist or mission if you need to do a specific step quickly. This top 10 list was designed to include easy and quick money making opportunities that can be repeated every day, which these below most certainly are not. This section isn’t meant to imply that you can’t enjoy these activities for the entertainment value, just don’t do them in hopes of making money in the game.
Heists
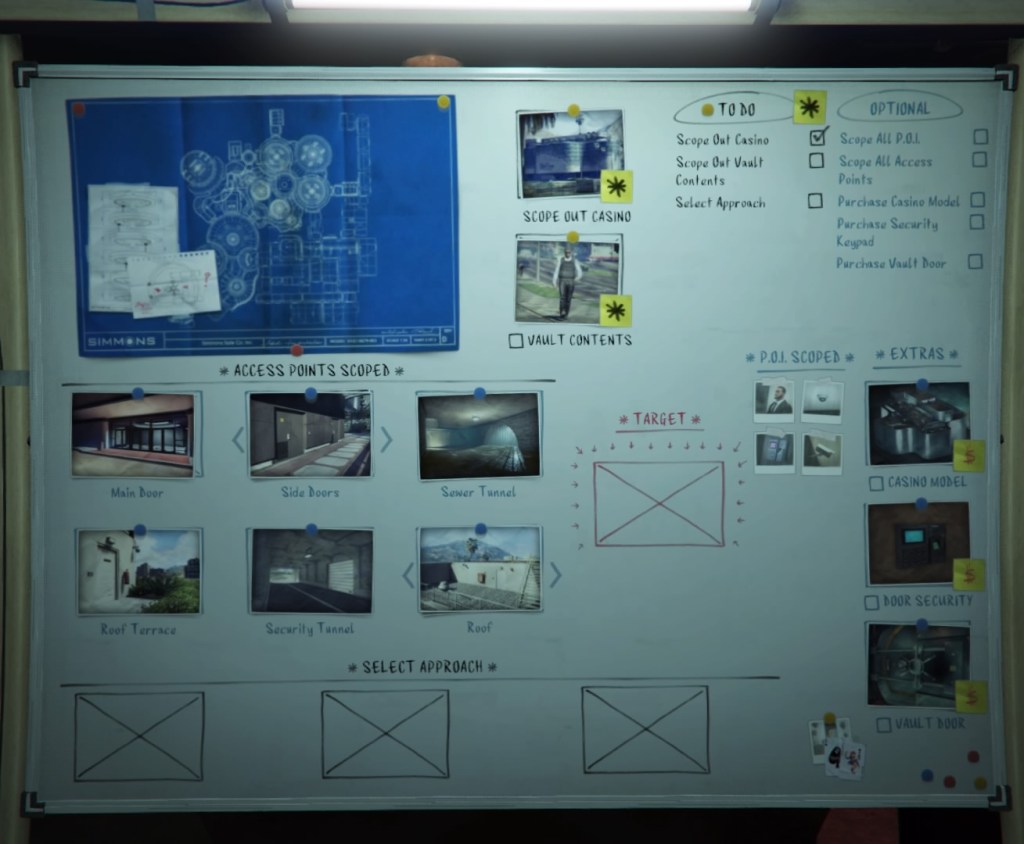
Heists are some of the most expensive and complex ways to make income in the game. Why? Because Rockstar requires that you buy very, very expensive real estate, boats, equipment, personnel and trucks to support the heist. All told, you’ll end up spending GTA$3-5 million (or more) in buying random in-game junk, just to net GTA$300,000 – GTA$500,000 back from the heist. You won’t make back even a fraction of what you spent to buy that boat, truck, warehouse, safecracker tools AND bunker. However, you can do it all again, but you’ll likely have to spend for at least tools, people and random junk running the heist for a second or third time.
Heists, while they may be fun when played in groups, are the worst ways to make money in the game.
Cost: Depends on Heist, but no less than GTA$3-5 million
Passive Income: None
Heist Reward: A paltry GTA$300,000 to GTA$500,000 max.
⤵
Galaxy Super Yacht
The Super Yacht is a waste of money. Sure, the captain of the yacht offers up some missions, but like Heists above, you must sink at least GTA$6,000,000 into the thing to get a couple hundred thousand out of it. Don’t buy this thing for the mission reward money. However, there are six missions which can be performed only once.
Cost: The Super Yacht begins at GTA$6,000,000 and is rarely ever discounted more than 10%
Passive Income: None
Active Income: Around GTA$30,000 per mission
Reward: Captain’s Outfit after completing all 6 missions
Daily Cost: GTA$1,000
⤵
Bunker Missions
Like Heists, you have to first invest in a bunker property, which is costly. Once you do this, you have to keep resupplying the bunker with more and more materials until you max out the products storage area. Then, you can take those products, load them into a crap vehicle and drive them across the map to the delivery location.

The problem is, bunker missions can only be performed in public servers. This means you’ll need to endure other players who are told you are moving goods and basically where you are on the map. Other players can come screw with you and those goods.
Once sold, you’ll get a fraction of the value because, in typical Rockstar fashion, they always skim GTA$ right off the top to keep you from getting as much as it says the goods are worth. Honestly, this one is too much of a hassle and costs too much money simply to net GTA$100,000 (or less). There are easier ways to get that amount of GTA$… see above.
Cost: Bunker cost begins at GTA$2 million, but you may be able to get it included in some bundles
Type: Recurring
Passive Income: None
Active Income: Requires carrying good across the map on a public server.
Reward: Some percentage of the value of the goods, if successful
Daily Cost: GTA$7,800
Note, the maintenance cost for owning a bunker is whopping GTA$7,800 per in-game day, but only if you’re actively CEO. Make sure to ‘retire’ as CEO before the day ends to avoid paying this stupid fee. This is the only maintenance fee you can avoid paying in this way. Also note, moving Bunker goods across the map requires at least two people to drive two separate delivery cars… it cannot be done solo.
⤵
Nightclub Goods

For the same reason as Bunker Missions, moving these goods has the same problem… public server, public announcement and players can screw with you. On top of that, your nightclub manager takes a cut leaving you with 10% less than what the goods are worth.
Cost: Nightclub costs around GTA$2,000,000 to own, plus maintenance costs.
Type: Active, Recurring
Passive Club Income: GTA$10,000 down to GTA$1,000 depending on whether the club is promoted
Reward: Depends on amount of goods sold, less 10% to Tony
Daily Cost: GTA$800 to GTA$2,250
⤵
Simeon Premium Deluxe Repo Cars
These missions are entirely multiplayer missions. If you can get a team of only your friends, it might be fun. If you are matched with randoms, likely there will be one who will torpedo the whole mission.
Cost: Requires multiplayer session with randoms. I’ve tried playing several times and each time the mission fails due to some random torpedoing it.
Type: Multiplayer, Recurring
Reward: Depends, but not as much as you’d hope.
⤵
Casino Penthouse
To own the Casino Penthouse, it costs GTA$1.5 million to GTA$6.5 million depending on which features you choose to buy. However, along with owning the casino penthouse, you’ll unlock missions from Agatha Baker, the casino manager. There are 6 casino missions that, when completed, will reward you with $GTA100,000 and the Enus Paragon R Armored version, which you pick up at the docks.





Cost: GTA$1.5 million to GTA$6.5 million
Type: Once Only
Reward: GTA$100,000 and Enus Paragon R Armored
Daily Cost: GTA$500 to GTA$1,350
⤵
Executive Suite Cargo Missions
Like most money making activities in the GTA Online world, for these you’ll need to invest in an Executive Office Suite, a cargo storage warehouse and probably several other things. All told, you’ll spend at least GTA$3-5 million (probably more) to net maybe GTA$100,000 every week or so. For example, the high value car cargo missions allow you to steal expensive cars, then store in them in the cargo warehouse. You can sell them immediately. The thing is, even though the car may be worth GTA$1.5 million, the maximum you’ll get by selling the best of them is GTA$80,000. In fact, it’s so little money and because it’s a real hassle, it’s not really worth the effort.
Cost: Executive Office (~GTA$1,000,000 or USD$20 for CESP) and Cargo and Crate Warehouse … ~GTA$5-7 million total
Passive Income: None
Active Income: Limited by Rockstar’s stupidity
Daily Cost: GTA$800 to GTA$950
⤵
50 Stunt Jumps
Don’t bother with this activity if you’re looking for GTA$. The only reason to do this one is if you’re trying for the Collectibles trophy. There are 50 stunt jumps all over the map. However, completing each jump only earns a tiny amount of RP. At 1, 5 and 25 jumps, these will unlock paint jobs at Los Santos Customs. This activity rewards no GTA$ at all.
Type: Free
Cost: None
Rewards: Only RP and Unlocked paint jobs
⤵
Stretching your GTA$ farther
As has been hinted all throughout this article, it’s better to wait for Rockstar to put vehicles, properties, weapons, armor and even outfits on sale. Each week, Rockstar chooses various items to discount. Some discounts are given straight up to all players. Extra discounts are given by linking your Amazon Prime account to Rockstar. These discounts never overlap, but do run concurrently with one another. For example, Rockstar typically puts properties or property features on sale regularly and then simultaneously discounts vehicles via the Prime Gaming benefits. However, when Rockstar puts properties on sale, they typically do not discount a property’s sub-features, which is a little frustrating.
For example, when Executive Offices are discounted, the Executive Office garages and the Cargo Warehouses are not discounted. This means, you’ll need to wait for the garages and warehouses to go on sale separately. This means you’ll need to wait until Rockstar puts those specific properties and features on sale, which might occur months apart.
For vehicles such as the Kosatka, Avenger, Terrorbyte and Mobile Operations Center, you’ll also find only one of these on sale at a time. Typically when a vehicle is discounted, its renovation features are not, though rarely they might discount both. You have to check.
When you find one of these vehicles heavily discounted, such as the Kosatka priced around $GTA1 million, you gotta jump on the deal quickly because it won’t come around again for at least 6-12 months.
Reviewing this article, you might notice I have a lot of these very expensive items in the game. I didn’t pay full price for any of them. I’ve been buying all of these items slowly on discount when the discounts occur. Some of the vehicles, I’ve won off of the podium, such as the Toreador, though I paid for the Stromberg, but on sale. However, I have been waiting for some vehicles to go on sale for several years, such as the Vigilante and the Oppressor. This is the only downside to waiting. However, waiting for discounts means you can stretch your GTA$ much, much farther and you get way more for less money.
That’s also how I afforded the Penthouse suite at the Casino. I first waited for the property to go on sale and spent about GTA$1 million. Then, I waited for each of the renovation features to discount and purchased those while also discounted. All told, I spent just over GTA$3 million to unlock all Penthouse features.
I’ve also specifically waited for many of the Super Cars to show up on the Lucky Wheel podium to win rather than spending GTA$2-4 million on each vehicle. Though, when I have occasionally purchased Super Cars, they have also been close to 50% off.
I know it can be difficult to wait, but waiting is far better than spending twice as much for in-game stuff that may never even be used. For example, the Avenger, Terrorbyte and Mobile Operation Center and even the Kosatka vehicles are a major waste of money. It’s a good thing I bought all of them when heavily discounted. In fact, I’ve never even used the Avenger, Terrorbyte or Mobile Operations Center. I also have a lot of vehicles I rarely ever use. My most used vehicle is the Deluxo, which I also won off of the podium.
Winning cars and using Rockstar’s discounts is the best way to stretch your GTA$ much farther. Also, take full advantage of any freebies Rockstar gives, particularly money giveaways for event participation.
⤵
Overall
There are other activities not mentioned above which can yield various amounts of GTA$, like the impossibly stupid flying missions at Los Santos Airport flying school, which yield insulting amounts of GTA$ once each impossibly hard and useless test is completed. Unfortunately, the rest in the game are not really worth mentioning, like RC car races.
One thing Rockstar needed to add to GTAO was way more passive income features from purchasing and owning properties. For example, every owned property should offer some level of passive income… at least enough to cover the daily expenses.
Overall, Rockstar pretty much failed us with Grand Theft Auto Online. While GTA V’s in-game money balance was decent, all of that was removed from GTA Online. What’s left is a basic shell that teases the player by handing out a pittance of money each day here and there. Even the Heists in GTA V offered up a decent sized reward. In GTAO, the Heist rewards are entirely insulting after spending millions buying all of the garbage needed to complete it. The best use of money in GTA Online is buying the cars. However, if you wait long enough you can win most of them off of the Lucky Wheel at the Casino, not pay anything for them… the best way to get most expensive cars in this game.
What you can’t win off of the Lucky Wheel podium are vehicles like the Kosatka, the Mobile Operations Center, the Super Yacht, the Avenger and the Terrorbyte. What’s worse is that the MOC, the Avenger and the Terrorbyte are all effectively the same vehicle, each in a different class. It’s such a waste of GTA$ buying the same thing multiple times.
Worse, these mobile weapon-and-vehicle workshops only work on weaponized vehicles. Even though these mobile workshops allow similar customization features as Los Santos Customs, these mobile workshops can’t modify regular vehicles… thus rendering the convenience of paying for these mobile workshops pointless. Rockstar just doesn’t seem to get that the usefulness of these mobile ‘Los Santos Customs’ workshops is the fact that you can modify your cars anywhere you choose rather than spending time driving the car over to an LSC. As expensive as these mobile workshops are, why wouldn’t you allow us to modify any vehicle in that mobile vehicle workshop?
What difference does it make if we modify our car in our Avenger or at Los Santos Customs? We’re still going to pay the price for each mod.
↩︎


 Random Thoughts - Randocity!
leave a comment