Recipe: How to make Sushi Rolls
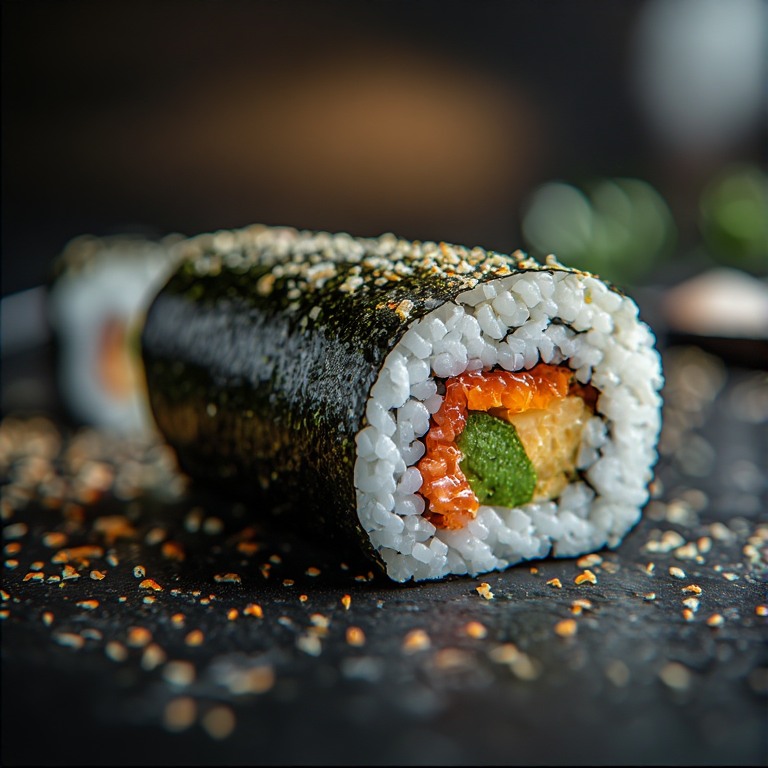 I love Sushi rolls from time to time, but I don’t often eat raw fish. This is a follow-on article from 2019’s Perfect Sushi Rice from the Microwave. This article focuses on how to actually make sushi rolls with the filling of your choice. Remember, you aren’t limited to what a Sushi restaurant offers. Let your imagination run wild and fill your roll with whatever tickles your fancy, sweet or savory. Let’s explore.
Let’s Begin
To make relatively authentic sushi, you’ll need some basic ingredients. Let’s get these food basics out of the way first:
- Nori Sushi Seaweed Sheets
- Short grain sushi rice OR medium grain rice OR Jasmine OR Brown OR Purple / Black Rice (Fan Tuan)
- Seasoned Rice Vinegar (Mitsukan / Mizkan or similar)
- Rice Seasoning (Furikake)
- Kewpie Mayonnaise (or any mayo of your choice)
- Wasabi paste or Wasabi Powder
- Sriracha Hot Sauce (optional)
- Sesame Seed (optional)
- Soy Sauce
- Pickled Ginger (red, pink or beige)
For choices of proteins, it’s really your call. If you want to make raw sushi, you’ll need to head to a Japanese market for sushi grade raw fish. Many Japanese markets cut sushi grade fish into small packages suitable for making sushi or sashimi. If you’re avert to eating raw fish, you can use whatever proteins you like.
For cooked alternatives, I like adding strips of cooked chicken, stripped and cut cooked ground beef, quarter cut hot dogs, cooked fish sticks, breaded and cooked fish, cooked and stripped fried chicken fingers, fake crab legs, etc. You can also make a vegetable roll with cucumber or even various pickles. You can even mix and match.
Yes, you can make protein salads to include inside of a roll like crab leg salad, chicken salad or even ham salad. Salads like these make excellent sushi rolls. Just make sure not to use too much mayonnaise in the salad or it may become too runny. The salad needs to remain thick and spreadable.
I’ve personally made hot dogs rolls complete with a small amount of chili as a topping. I’ve made hamburger rolls with cheese, onion, lettuce, pickle, tomato, mayo with a dollop of relish, mustard or ketchup. Just make sure the ingredients are cut into strips to fit across the roll. Or, alternatively add a small amount as toppings to the top of the roll.
The choices for what goes into your roll is endless. As long as it’s not runny or liquid, you can spread it across the roll and roll it up. Don’t feel constrained to the limited ingredients offered by Sushi Restaurants. Go forth and make new rolls.
Tools Required
You’ll also need some tools:
- Sharp Knife
- Cutting board
- Bamboo Sushi mat (for shaping rolls)
- Rice Cooker with paddle
- Rice Washer strainer and bowl combo (Daiso)
- Vegetable Peeler (optional, for cucumbers)
- A small water spray bottle
Which Rice Cooker?
A quality rice cooker is a must to make any sushi. You can buy an electric one, use a stovetop pan or cook Sushi rice in a microwave. I personally prefer using the Microwave method because it’s set-it-and-forget-it AND you’ll get every last grain of rice out of it (zero waste). When cooked properly, there is no difference between the cooked rice quality using any of these cooking methods.
Unfortunately, cooking rice on the stovetop and, to a slightly lesser degree, an electric rice cooker, is likely to yield some rice loss due to sticking. Because the rice needs to retain a sticky quality, heating element based cookers will lose a small percentage of rice to some of it getting crusted onto the sides while cooking.
The microwave method doesn’t have this waste issue. A proper microwave rice cooker will yield 100% rice out with no sticky baked on mess. If you’re paying to buy expensive Sushi rice, why waste any of it?
If your rice cooker doesn’t come with a plastic or wooden rice paddle, you’ll need to locate one. If you’re concerned over microplastics, then a bamboo paddle might be your best choice. Keep in mind that microwave rice cookers will be plastic. So, again, if you’re concerned over microplastics, you might want to opt for cooking your rice on a stovetop or in an electric rice cooker using metal components.
Rice Types and Rinsing
Many sushi chefs swear by using only short grain Sushi rice. I’ve used all sorts of rices to make sushi and while Sushi rice generally works well, it has a very soft chew, is not aromatic and is also very glutinous (making it quite sticky). Sushi rice needs to be washed until the water runs clear, about 3-5 rinses before cooking. Sushi rice cooks in the same time and in the same proportions as any other rice. When cooked, it’ll be more sticky than medium grain rice.
Medium grain white rice can be used to make Sushi rice. This type of rice is firmer than sushi rice once cooked. It has definitive bite that can be felt. While short grain Sushi rice doesn’t have this bite, medium grain white rice does. And no, do not overcook medium grain rice thinking you can make it have a similar texture to sushi rice. The only thing that overcooking does is make the rice bad.
Basmati, Jasmine and other longer grain rices can be used to make sushi, but these are aromatic rices and impart an odor onto the roll. You may like the aromatic nature of these rices, but that odor may or may not work with the ingredients you wish to add to your roll, particularly the odor of the Nori seaweed once hydrated by the rice. Additionally, longer grain rices offer less glutinous features, making the rice more dry and less sticky.
When using less glutinous rices (medium grain, Basmati, Jasmine) for Sushi, you must rinse the rice exactly one time. Rinse the rice to remove any unnecessary extras once. Rinsing only once allows much of the loose rice starch to remain. You need this loose rice starch powder to allow the rice to hold together when placed into a Nori sheet or if you want to make Nigiri and form the rice into small balls. Rinsing more than once will rinse all of these starch away causing the rice to become fluffy, but not sticky. For sushi, you don’t want fluffy rice, you need sticky rice.
Brown rice is an odd beast. It takes longer to cook and has less overall loose starch. You can use it to make sushi, but you should rinse it as little as possible. You may still find it doesn’t clump or stick together as well as some white rices, though. If you have trouble keeping your brown rice together, you might need to include some extra rice flour (quarter teaspoon rice flour per cup of rice) to add some stickiness back into the rice. You won’t know you need the extra starch until after the rice has been cooked, though. I’m not a big fan of brown rice sushi, but if you like it, go for it.
Parboiled Rice or Instant Rice?
This addition is being added after the original article’s release to head off any questions about these “quick cook” types of rice. Parboiled rice is a type of rice that has been previously PARtially BOILED, hence the name. This type of rice is not useful for Sushi. Avoid using all varieties of parboiled rice for sushi. Because of it having been previously boiled, too much of the outer starch has already been boiled away, making it not at all sticky. You need a stickier type rice to use as Sushi rice because sticky rice sticks together on itself. This stickiness is what holds the sushi rolls together. Without this stickiness, the rolls will fall apart. Often, you can visually tell parboiled rice by its yellowish color. You should also read the package which should state if the rice is parboiled.
Instant rice, like parboiled rice, is likewise previously cooked. Unlike parboiled rice which is only partially boiled, instant rice is fully cooked, then dehydrated. This dehydration process allows the rice to hydrate in just a few minutes, but at the cost of removing a ton of starch. While both parboiled and instant rices are great in certain quick culinary uses, neither are useful for making Sushi. Instant rice is not a yellow color like parboiled. If you have dry regular rice and instant rice side by side, they sort of appear similar, except that dry instant rice can be easily crunched by chewing on a single grain. Regular rice cannot be easily chewed when dry and remains rock hard until cooked.
Avoid these two types of “quick cook” rice when purchasing rice for Sushi!
Nori Sheets
Nori seaweed sheets are important for making any sushi. These sheets are made and used in Japan, South Korea and China. In Japan, it’s called Nori. In Korea, it’s called Gim. In China, it’s called Haitai or . Various similar kinds of rolls are made in all three countries.
In Japan, the rolls are called Makizushi or simply just Maki. In Korea, it’s called Gimbap or Kimbap. In China (specifically Taiwan), it’s called Fan Tuan or Ci Fan Tuan. However, Fan Tuan often uses purple or black glutinous rice instead of white rice. Most often, Fan Tuan is consumed as a breakfast food in China.
What this all means is that you have a number of choices in which to locate sheets of Nori. You can get these sheets in Chinese, Japanese or even Korean markets. I have typically found sheets sold in Korean or Chinese markets to be lower priced than those sold in Japanese markets. However, there are some quality differences in various sheets. What this means is that you will need to try various brands until you find a brand you can both rely on for quality and for availability.
Personally, I’ve found that the Yamamotoyama (Japanese) brand always offers consistent sheet quality. Unfortunately, this Japanese brand is not the lowest cost brand of Nori. However, I have also found some Gim sheets in various Korean markets that also work quite well and are much lower in price. By quality, I mean that the sheets hold up to the stresses and strains of being rolled. They do not rip and tear. However, some sheets made are of a lower quality and can and do rip and tear, both when wet and when dry. Again, you’ll need to shop the brands and find one that works for you.
Oh, and while you can buy 5 or 10 sheets at places like Walmart or your local grocery store, these are exceedingly costly per sheet. It’s better to invest in a large package of 20-50 sheets from your local Asian market to get your best price per sheet. You can order Nori from Amazon and from eBay also.
I might suggest the first time buying a small package of Yamamotoyama brand sheets so you can see what good quality sheets look like. Then branch into lesser brands and see how far you get with those.
Prepping
Preparing your ingredients and placing them onto plates in advance is strongly recommended. I recommend doing this while waiting for your rice to cook in about 18 minutes. When it comes time to assemble your rolls, it’s a simple matter of grabbing your ingredients, placing them on top, seasoning them and rolling it all up. If you’re having to prep in the middle of making a roll, your rice will cool down and the Nori wrapper will start to get flimsy. You need to work fast once you apply the rice to the Nori.
If you’re wanting to make cucumber rolls, for example, you will need to peel your cucumber, then slice it into small wedges. Cut the cucumber in half, then cut the half in half again. When I say “cut in half”, I mean long ways. You need your cucumber slices to be long and thin, longer than the length of the roll preferably. Then slice each quarter into two or possibly three wedges. You want the wedges long enough to span the entire roll length and thin enough not to make the roll be too thick, especially when using multiple ingredients. If not long enough, then place two pieces edge to edge to make it long enough.
Additionally, ensure you have your wasabi prepared and bloomed, your Kewpie mayo out and ready, your seasonings at hand, your rice paddle and spray bottle with water ready.
Seasoning the Rice
Once you have your rice properly cooked and with your Seasoned Rice Vinegar in hand, you will need to season your rice. Make sure that you’ve purchased Seasoned Rice Vinegar and not Natural Rice Vinegar. Seasoned Rice Vinegar is sweetened. Natural Rice Vinegar isn’t seasoned.
If you are watching your sugar intake, you can make your own Seasoned Rice Vinegar using Natural Rice Vinegar and low sugar sweeteners like Saccharin, Stevia and Splenda. Don’t use Equal / Aspartame because it will be applied to the rice while hot. Heating Aspartame above 86ºF / 30ºC begins breaking down Aspartame into constituent components, such as formic acid, aspartic acid / phenylalanine and formaldehyde. Only use Aspartame to sweeten cold drinks, never to sweeten hot foods or hot beverages. Keep in mind that rice is high in carbs and sugars, so reducing the amount of sugar in the Seasoned Rice Vinegar might not do much to reduce the sugar load in Sushi with rice.
Do not use unseasoned rice in a sushi roll! To season your rice and while still in your rice cooker, add in about a tablespoon and a half of seasoned rice vinegar and begin to mix (per 1 cup dry-now-cooked rice). Do this while the rice is still hot. Taste. If you can’t taste the vinegar, add a splash more to the rice, mix again and taste. You should be able to taste the vinegar, but it should not overwhelm.
Adding rice vinegar pulls some of the rice starches out of the rice and allows it to become sticky while mixing the vinegar in. This step is what helps out less glutinous rices, like medium grain white rice, to make them be useful in Sushi rolls. Absolutely do not skip this step if you’re using medium grain white rice! Remember, you don’t want fluffy rice, you want stickier rice.
Once your rice is seasoned, set it aside and let it cool a little bit more.
Rolling up your Sushi Roll
I do this next part on a paper towel because it makes for easier cleanup and offers an easy way to pick up the edge of a sheet to begin rolling it up. The Nori does not stick to the paper towel. You could use wax paper or parchment paper if you prefer.
1 cup of dry sushi rice yields enough cooked sushi rice to produce 3 full-sized Nori sheet rolls. If you want to make hand rolls, half rolls or any thing smaller than a using a full sheet of Nori, you’ll have to figure out the proportions of rice to seaweed. This article is focused on making 3 large “regular” Maki rolls using 1 cup dry cooked rice as a basic starting point.
You’ll want to use the rice paddle to divide the rice into thirds for easier visual reference and to make 3 rolls easier. Place your dry Nori sheet onto the paper towel and drop ⅓ of the cooked rice onto that Nori sheet. Using the rice paddle, begin pressing and spreading the rice to the edge of the Nori on 3 sides. When spreading, use pressure to flatten the rice onto the Nori. Use the paddle to evenly spread the rice out to 3 of the edges. On the fourth side, leave a 1 inch gap between the rice and the top of the sheet. Because the Nori sheet is rectangular, the rice will effectively make a square below the 1 inch gap.
Once you have the rice fully spread and pressed out onto the sheet, grab your Furikake and give the rice a light dusting. Now, with your clean finger or a knife, grab a dollop of wasabi and spread a small amount across the rice just below the middle. It should spread evenly all the way across. Make sure to use enough. If you have tube wasabi, you can simply use the tube nozzle itself to spread it across.
From here, grab your main protein or vegetable ingredient and place it across and centered, but running horizontally across the rice, making sure it covers all the way across. It should sit horizontally edge to edge in the middle of the rice. It’s perfectly okay for some of the protein to hang over the edge of the rice. The two cut end pieces will actually look better with a small amount hanging over. For reference, you can place two or maybe 3 different ingredients in the middle stacked neatly horizontally across the rice. Anymore than this and the roll is likely to end up too big.
On top of your ingredients, squirt a squiggly line of Kewpie mayonnaise horizontally across the ingredients. You can top the mayo with a bead of sriracha sauce, powdered cayenne pepper, pepper flakes or even chili oil if you want to make it spicy.
At this point, your roll is complete, but not yet rolled. Grab the bottom edge (opposite side of the 1 inch gap side), lift the Nori and rice carefully, then place that rice edge just over and in front of the ingredients to begin the rolling part. Push the edge under the ingredients somewhat tightly as best you can and then begin to roll towards the 1 inch gap. Leaving the empty Nori edge unrolled, grab your water spray bottle and spray the gap seaweed to wet it. Wait a moment, then slowly finish rolling over the gap edge, pausing and allowing the Nori to begin sticking to itself while the roll sits.
From here, lift the roll up and flip it over or roll it over if you’re uncomfortable lifting it. The gap edge may not yet be fully sealed to itself. Grab the spray bottle again and wet the outside of that loose gap edge to wet it fully and smooth it down. Now, set the roll down onto a plate gap edge down. The weight of the roll will seal the roll closed while you make more.
Grab the Sushi mat, place the roll into the mat, lightly squeeze and roll the mat to make the sushi more round. Note, you can skip this process if you don’t really care how your Sushi roll is shaped.
Repeat this process for the remaining two rolls. After doing this a few times, you’ll get the hang of the rolling fairly quickly and will understand the nuances of exactly how to roll it tightly. You’ll want to roll each roll somewhat tightly so that the roll holds itself together. If it’s too loosely rolled, the roll will fall apart.
Cutting the Rolls
Once all three rolls are complete, grab the first roll made, a very sharp knife and a wet towel or wet paper towel. A roll cuts into about 8 pieces. Six full pieces and two edge pieces. At this point, I’d suggest using the knife to lightly indent the Nori to make 8 potential cut marks. Just indent on the seaweed, but don’t cut it. Indenting the roll gives you a reference point to make your most even cuts, while allowing you to adjust the indents to give you the thickness you prefer. Remember, a piece needs to fit in the mouth comfortably. Eventually, you won’t need to make indents on the roll, but when learning, indenting on the roll makes it easy to create even thickness roll pieces.
Once indented, begin cutting on the indent marks with a light sawing motion. The knife should cut through the roll easily. If it doesn’t, your knife is too dull. Use a sharper knife. Use the wet towel to wipe the knife occasionally when it becomes dirty. This cleaning prevents smearing ingredients on the outside of the roll.
Place the cut rolls onto a plate in whatever arrangement looks best. It’s your plate. Present them as you prefer. If your roll is falling apart when cut, you either didn’t roll it tightly enough and/or the rice isn’t sticky enough to hold the roll together. Rinse the rice less next time, add more vinegar when seasoning and/or press the roll more tightly when rolling. You want your roll to be relatively tightly rolled, but not so tight as to rip the Nori.
From here, top your plated rolls with sesame seeds, a small dollop of Sriracha, a sprinkle of cayenne or any other topping you might think goes with your roll type. When I make hot dog rolls, I top with a tiny dollop of mustard, ketchup and relish.
Enjoying your Rolls
Once you’ve got your rolls cut and plated, to the plate you’ll want to add a ball of Wasabi, a pinch of pickled Ginger and have a small bowl of Soy Sauce handy for dipping. If you like eating with Chopsticks, then you’ll need to get a pair. You still want your sushi to be lukewarm, but not hot. The rice should still have a some warmth when consuming the roll. A little warmness makes the roll taste so much better. Don’t let them get cold before serving.
You can turn this into a full meal by adding a bowl of Miso Soup and/or steamed Edamame. You’ll need to pick these additions up and prepare them separately.
Yes, you can and should refrigerate leftovers. If you want to eat refrigerated leftovers, you might want to microwave them for about 15 seconds to slightly warm them. For safety, don’t let them sit around and warm up on the counter as they contain mayonnaise. Eat leftovers within a few days.
Final Notes
This Maki recipe above does not produce “inside out” rolls. The rolls produced here are rolls with seaweed on the outside and rice on the inside. These rolls are easier to make when just learning to make Sushi rolls.
If you wish to make “inside out” rolls, you will need to wrap your Sushi mat in plastic wrap to keep the rice from sticking to to it. Then follow the above instructions. But, after you have paddled and packed the rice onto the Nori (use a thinner layer of rice), cover in sesame seeds, turn the sheet over, add a smaller amount of rice onto the Nori to “wrap” your ingredients, then add your ingredients on top of this rice. Then roll up so that sesame seed rice is on the outside with some rice and filling on the inside with your ingredients. You may need to make a bit of extra rice for “inside out” rolls if you still want 3 total rolls.
“Inside out” rolls are often topped with Masago (tiny reddish orange roe fish eggs) and sometimes black sesame seeds.
↩︎
Perfect Gravy from the Microwave!
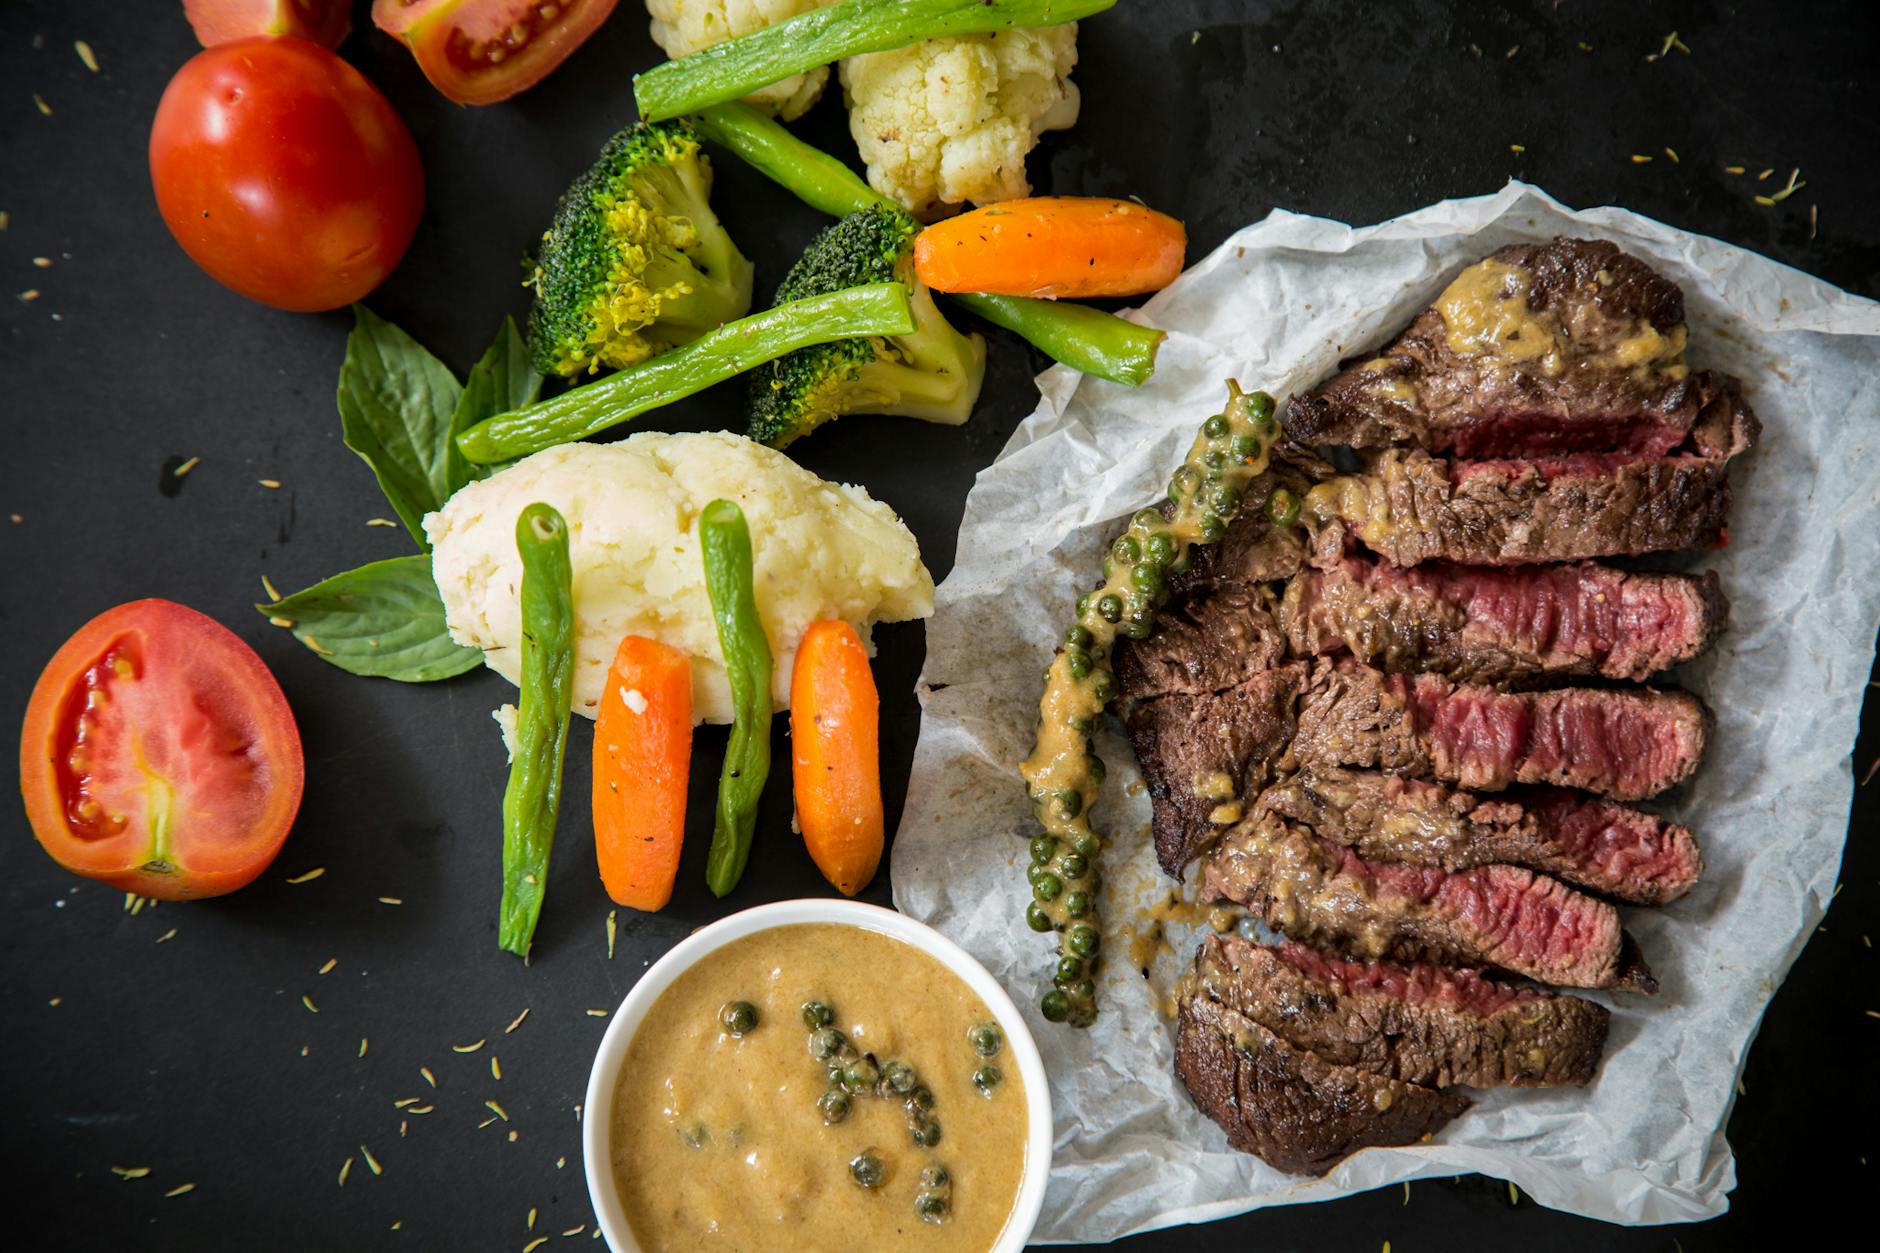
For some reason, a lot of people seem to feel uncomfortable or downright scared to use the microwave for cooking certain foods. The microwave is a very useful appliance for cooking. I’ve written a few past articles including the Microwave Mug Cake and How to Cook Sushi Rice in a Microwave. The microwave is an excellent appliance to cook various foods fast, but you’ll need to know how to properly use it. One thing that a microwave is excellent for is heating liquids rapidly… which is why gravy works great here. Today, let’s explore how to make gravy in a microwave in 5 minutes or less.
Prerequisites (What You Will Need)
- A glass measuring cup or small microwave safe bowl
- A spoon for stirring
- A set of measuring spoons
- All Purpose Flour (bleached or unbleached, NOT self-rising)
- Salt and Pepper (to taste)
- A Food Thermometer (optional, but very helpful)
- Stock / Bone Broth
Gravy starts with Chicken, Turkey, Beef or Pork Stock
Stock is the drippings left over after cooking most juicy meats. You’ll get these drippings from poultry, beef and pork. Even a small chicken leg quarter can produce enough drippings to make gravy. You can extend the amount gravy by adding a little water. After all, when it’s cooking, some of the water will evaporate making the drippings a bit concentrated.
Before making gravy out of your drippings, you’ll want to taste it. Not all stock flavorings will work for standard gravy. For example, if you’re wanting to save stock from your BBQ grilled meats, smokey BBQ flavored stock usually doesn’t work well as gravy. Instead, you might want to save those drippings to craft a BBQ sauce instead. That’s for another recipe, though.
If you’re oven baking your meats, meat drippings will work just fine for making a thick savory gravy.
The Trick to Great Gravy
To begin this recipe, it is recommended to use a microwave safe glass measuring cup with a handle. These cups have pour spouts and a stay-cool handle for when things gets hot. Glass measuring cups are typically microwave safe and are easily handled. It can also double as a gravy pouring dish if you don’t want to mess up more dishes.
The trick to making great gravy is to let the stock cool to 110ºF / 48.9ºC or less. You want the stock to be a tad lukewarm to allow for the next part to work, but not hot enough to activate the thickening. To cool your stock faster, slowly swirl it in the measuring cup, being careful not to swirl it all over yourself or the floor. If you’re not good at swirling things, try using a spoon instead. You can even dip the spoon in an ice water bath before stirring the liquid.
What trick is this?
In your measuring cup with your cooled stock, mix in about 3-4 heaping teaspoons of flour into 1/4 to 1/2 cup of stock. If the temperature is correct, the flour will mix in easily with just a bit of stirring, but not begin thickening. You might need to break up any dry clumps with a spoon, though and make sure they get fully incorporated into the liquid.
The drippings should turn lighter in color and appear opaque and cloudy, but remain watery. This is what you want. If you let the mixture sit too long after stirring, the flour will begin to settle to the bottom. If this happens, you’ll need to stir it again before beginning the microwave part.
Once the mixture is incorporated, fully cloudy and freshly mixed, place it into a microwave.
How to Prepare
To finish the gravy off once in the microwave, start the microwave on high for 30 seconds. The outer portions touching the glass will begin to bubble and appear thick. When the microwave stops, stir the mixture thoroughly for about 1-2 minutes or until the gravy begins to thicken. It should actually be thickening already.
Place the measuring cup back into the microwave for another 30 seconds. Then, remove and stir. At this point, your gravy should be fully thickened and ready. You can now add salt and pepper to taste. Your gravy is done. Serve immediately.
Too Thick? Too Thin?
If your gravy seems too thick and seems almost clumpy, there is an easy fix. Add in a bit of room temperature water to thin it out. Stir as you add the water slowly until you get it to a desired gravy thickness.
If your gravy is still too thin, place it back into the microwave for another 30 seconds and see if that helps. If it doesn’t, you’ll need to wait until the mixture has cooled to around 110ºF / 48.9ºC again and then mix in more flour, perhaps 1 or 2 more heaping teaspoons. Always make sure to incorporate the flour thoroughly. You want gravy, not clumps. Then, follow the steps above once more.
Note that very low wattage microwaves might need a longer time to begin to see bubbling, up to 1 minute. Higher wattage microwaves might need less time, perhaps even as little as 15 seconds per stir.
Should I remove the oil on the top?
No, you should not. Unless you have a medical condition that warrants the removal of the oil for medical purposes, the oil should be left in as it will add flavor and texture to the gravy, making it more savory and giving it a better overall texture, particularly when topped onto mashed potatoes. The oil also aids in the thickening process.
If there’s more oil on top than watery liquid on the bottom, you’ll want to spoon out some oil leaving some on top. Then add more water to bring the overall watery portion to more than the oil. The oil on top should be less than the amount of liquid below it. This oily situation can happen with fattier cuts of meat. I’ve never seen this happen with chicken.
You can even fortify the flavor of the watery drippings portions by adding in bouillon flavoring. Be careful doing this as bouillon tends to add a lot of extra salt.
In about 1 minute, you’ll have excellent thick gravy for mashed potatoes or to top your favorite meats. No need to toss the small drippings out. Instead, turn those drippings into a savory gravy. Even just a quarter to half cup of gravy is enough to cover mashed potatoes for two people and still have a bit left over.
↩︎
Where can I find Delbert’s Traditional Chitlins in Fallout 76?
 This is a question with few answers on the Internet. Let’s me answer it here.
Fallout 76 and Bugs
[Updated: 1/30/2022] Good news! Happy to now report this recipe is finally available in the game. After 4 years of reporting this bug both on this blog (and to Bethesda), Bethesda has finally decided to fix it. Delbert’s Traditional Chitlins is FINALLY learnable. I do not know which release actually fixed it, but it was a release sometime between September 2021 and January 2022. The last time I attempted to retrieve this recipe was in the summer of 2021 and it was still broken even then.
With that said, let’s talk about where this recipe is located.
Delbert’s Traditional Chitlins
This recipe spawns at the Spruce Knob Campgrounds located at Spruce Knob Lake and which actually gets you closest to this table via the Spruce Knob Lake fast travel point. If you have played through “The Order of the Tadpole” quest line, you have probably attempted to obtain the Swimmer’s badge. If you have, then you know this lake.

The recipe paper is located on a picnic table right next to a blue cooler. The picnic table is next to the shore of Spruce Knob Lake. Again, use the Spruce Knob Lake fast travel marker to get here, but be sure to bring enough ammo to avoid the two Mirelurks and the Mirelurk King that skulk around the shore line.
In case you’re wondering, the issue with this Recipe is that it was formerly bugged, for 4 years running! When Bethesda released this recipe into the game, this piece of paper had no interaction (see the screenshot). However, 4 years later and this bug has now been fixed! It took 4 years for Bethesda to fix a relatively simple bug! This means you can now retrieve this recipe and learn it. However, the placement of the recipe has been moved from next to the cooler (pictured) to the left lower edge of the table.
Bug Fixes
Yay, it’s finally fixed!
All 13 Delbert’s recipes are finally available in Fallout 76. All of these recipes look like a piece of 3 hole school paper. They do not have the same appearance as standard recipes. In fact, let me explain where each of Delbert’s Recipes spawn.
Note that early in the game’s life, Delbert’s Sunshine Oil, Mountain Hocks and Appalachili all existed in Flatwoods. After the Steel Dawn update, two moved to new locations. The recipe locations are as follows:
- Delbert’s Appalachili recipe is still located next to the armor bench on the porch of a house just across from the Flatwoods Tavern.
- Delbert’s Bunless Cramburger recipe is located at The General’s Steakhouse in the Cranberry Bog. It is located downstairs in the basement kitchen at the end of the counter to the right just as you come down the stairs. This is NOT the same recipe as “Cramburger”. Bring ammo or don your 3 star Sneak Card, because you’ll need to take care of a number of Super Mutants and two hounds downstairs or sneak past all of them.
- Delbert’s Company Tea recipe is located at Superior Sunset Farm in a half-open basement of this farmhouse in the Cranberry Bog. It is pinned to a cork bulletin board.
- Delbert’s Corn Pone recipe is located in a small funnel cake stand at Tyler County Fairgrounds. This kitchen spawns a Scorched inside.
- Delbert’s Delicious Deerskins recipe is located behind a Level 2 locked door to a candy shop at Wavy Willard’s. Be sure to equip your lock picking cards.
- Delbert’s Granny’s Sweet Tea recipe is located at Mac’s Farm on a small table to the right of the front door entrance. Watch out for the Mirelurk Queen and two Mirelurks around the house.
- Delbert’s Mountain Hocks recipe
is located next to a skeleton in the Red Rocket just outside of Flatwoods. This recipe is currently located at Beckwith Farm (Savage Divide) on top of a stone of a burned out campfire. - Delbert’s Mud Cookie recipe is located on the kitchen counter of the blue house at Aaronholt Homestead.
- Delbert’s Pothole Potpie recipe is located in
the center of Treehouse Village in the Mire.It is on a shelving unit across from Lorne’s terminal. This recipe can now be found at The Retreat (formerly named Treehouse Village). The recipe sits immediately to the right of Lorne’s terminal which was moved onto a small desk in a new area. From the spawn point, run straight ahead towards a power armor repair station, run up the stairs and into the red door. - Delbert’s Sweet Labrador Tea recipe is located inside of Raleigh Clay’s Bunker in the mire. It is on the dining room table in the kitchen. You will need to begin the quest at Abbie’s Bunker to get the password to gain access to Raleigh Clay’s bunker.
- Delbert’s Sunshine Oil recipe
was located in Delbert’s trailer on the nightstand next to the bed. It can currently be found inside the right most of two adjoining houses in Welch on the kitchen counter. - Delbert’s Tato Salad Surprise recipe is located on the kitchen counter at Silva Homestead.
- Delbert’s Traditional Chitlins recipe is located at the Spruce Knob Lake Campground Area (Savage Divide). It is located on a picnic table near a blue cooler next to the edge of the table. This recipe unlocks Chitlins Con Carne.
Updated Note as of 2/2021: As of a recent update (perhaps Steel Dawn), Bethesda removed two of the recipes from Flatwoods and located them elsewhere. Delbert’s Sunshine Oil recipe can no longer be found next to the bed in Delbert’s trailer. Delbert’s Mountain Hocks recipe no longer spawns next to the skeleton in the Flatwoods Red Rocket. Of the three, only Delbert’s Appalachili recipe remains in its original location in Flatwoods.
Here are pictures of each of these recipes in Fallout 76:
Recipe Notes
Delbert’s Company Tea requires using a serving of Delbert’s Sweet Labrador Tea to make. This means you’ll need to have both recipes to make Delbert’s Company Tea. To make Sweet Labrador Tea, you’ll need honeycomb… a very hard ingredient to find in the game. As for where to find honeycomb, I’ll have to leave you to locate that in Fallout 76 for yourself.
Also note that you are allowed to pick up all of these recipes more than once, as of now. However, the recipes may also only be acquired once per 24 hour period of time (real 24 hours, not in game hours). This means you must wait for the recipe to respawn over a full 24 hour day of play time. Note, Bethesda can always change this or any game mechanic. If the recipe hasn’t respawned and it seems like a long time, you must play a full 24 hours of real clock hours in Fallout 76 before the recipes will respawn. Basically, give it plenty of time.
Alternatively, here’s a faster way. If you have multiple characters and subscribe to Fallout 1st, while waiting for them to respawn for your primary character, have your alt characters go get the recipes and hand them over to your primary character. Each character has a separate 24 hour clock for these recipes.
Good Luck!
↩︎


1 comment